Create an Azure App User for the Service Connection
The answer is an Azure app registration with a client ID and secret, linked to a Power Platform application user. This page walks through all three stages.
This is the most common cause of a CRM connection that suddenly stops verifying. Fix it in two steps:
- Create a new client secret (Stage A, step 8).
- Update it in the Management App: open the CRM connection record and use its VERIFY URL to enter the new secret (see Stage C).
You do not need a new app registration or a new application user for this.
What you'll need
- Azure Active Directory Admin permissions in the same Azure tenant as your CRM
- Power Platform Admin permissions
- The AutoMerge Managed Solution already installed (it provides the security role you'll assign)
Overview
Stage A happens once per Azure tenant. Stages B and C happen once per CRM organization (Production, Sandbox/Dev, Sandbox/Test, and so on).
| Stage | Where | What happens |
|---|---|---|
| A | Azure Portal | Create the app registration, add permissions, create a secret |
| B | Power Platform Admin | Add an application user linked to that Azure app |
| C | Management App | Enter the client ID and secret, verify the connection |
Stage A. Azure portal setup
These app registration steps are needed once per Azure tenant, and the result can be referenced by multiple CRM organizations (Production, Sandbox/Dev, Sandbox/Test). If you already have an app with saved client ID and secret values, skip to Stage B.
A-1. Open Azure Active Directory
Sign in to portal.azure.com as someone with Active Directory Admin privileges. Search for and open Azure Active Directory.

A-2. New app registration
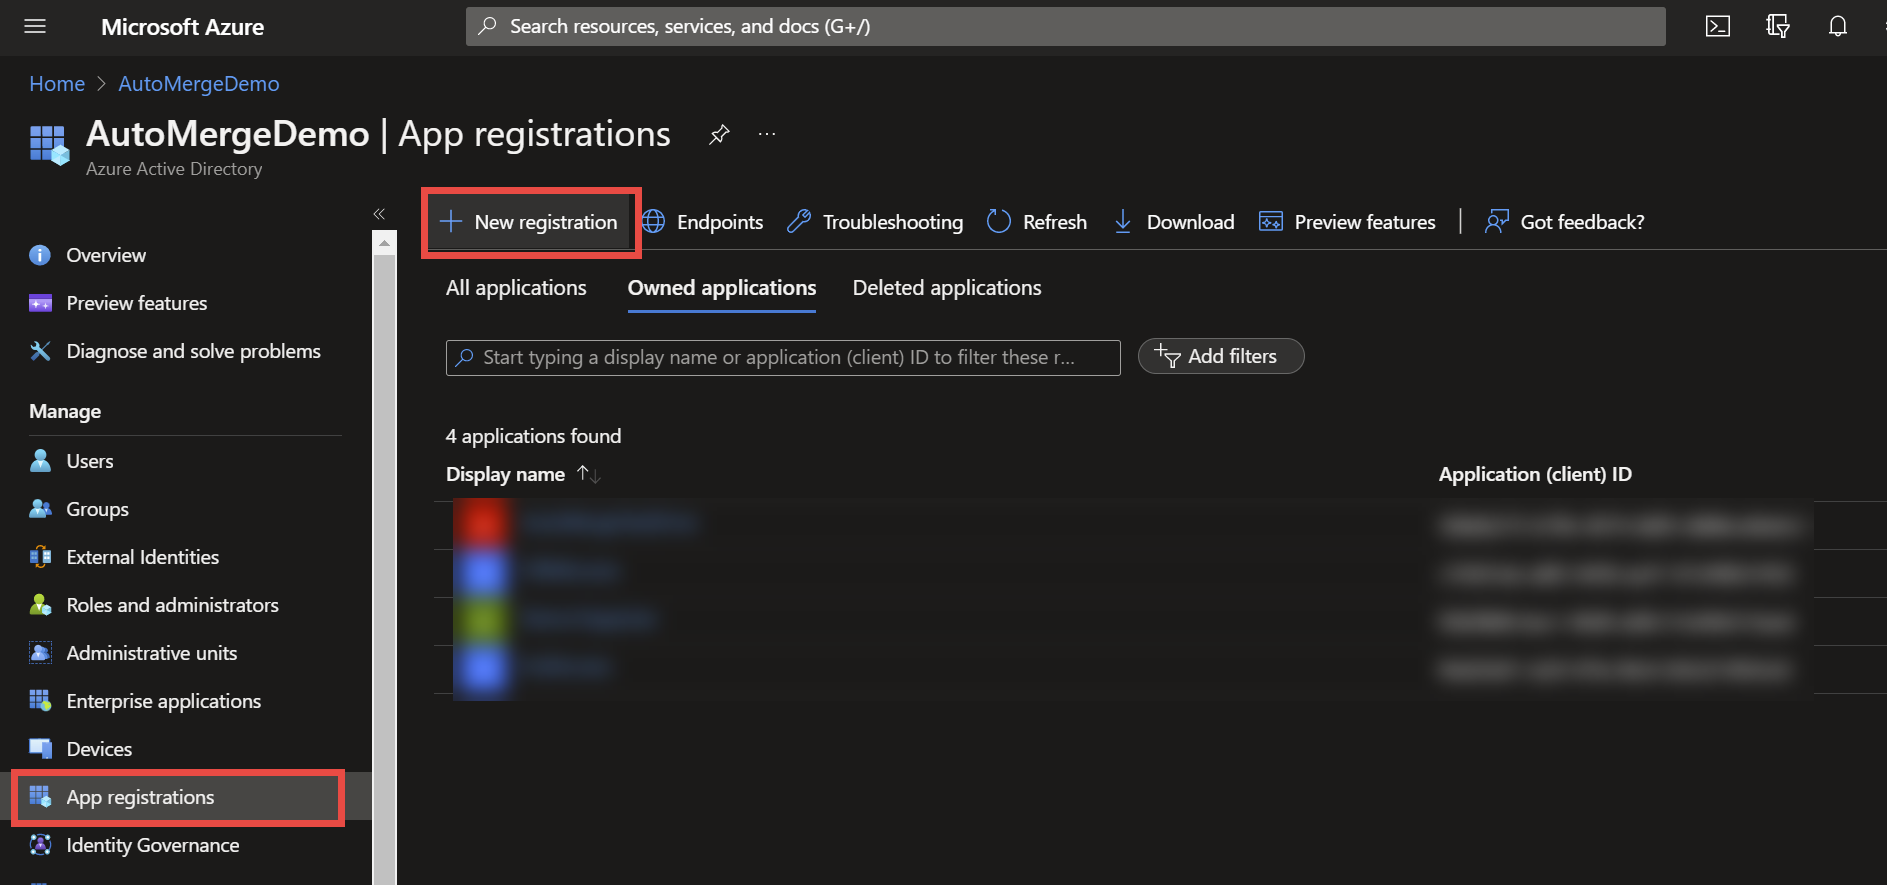
In the left navigation, choose App registrations, then click New registration.
A-3. Name it
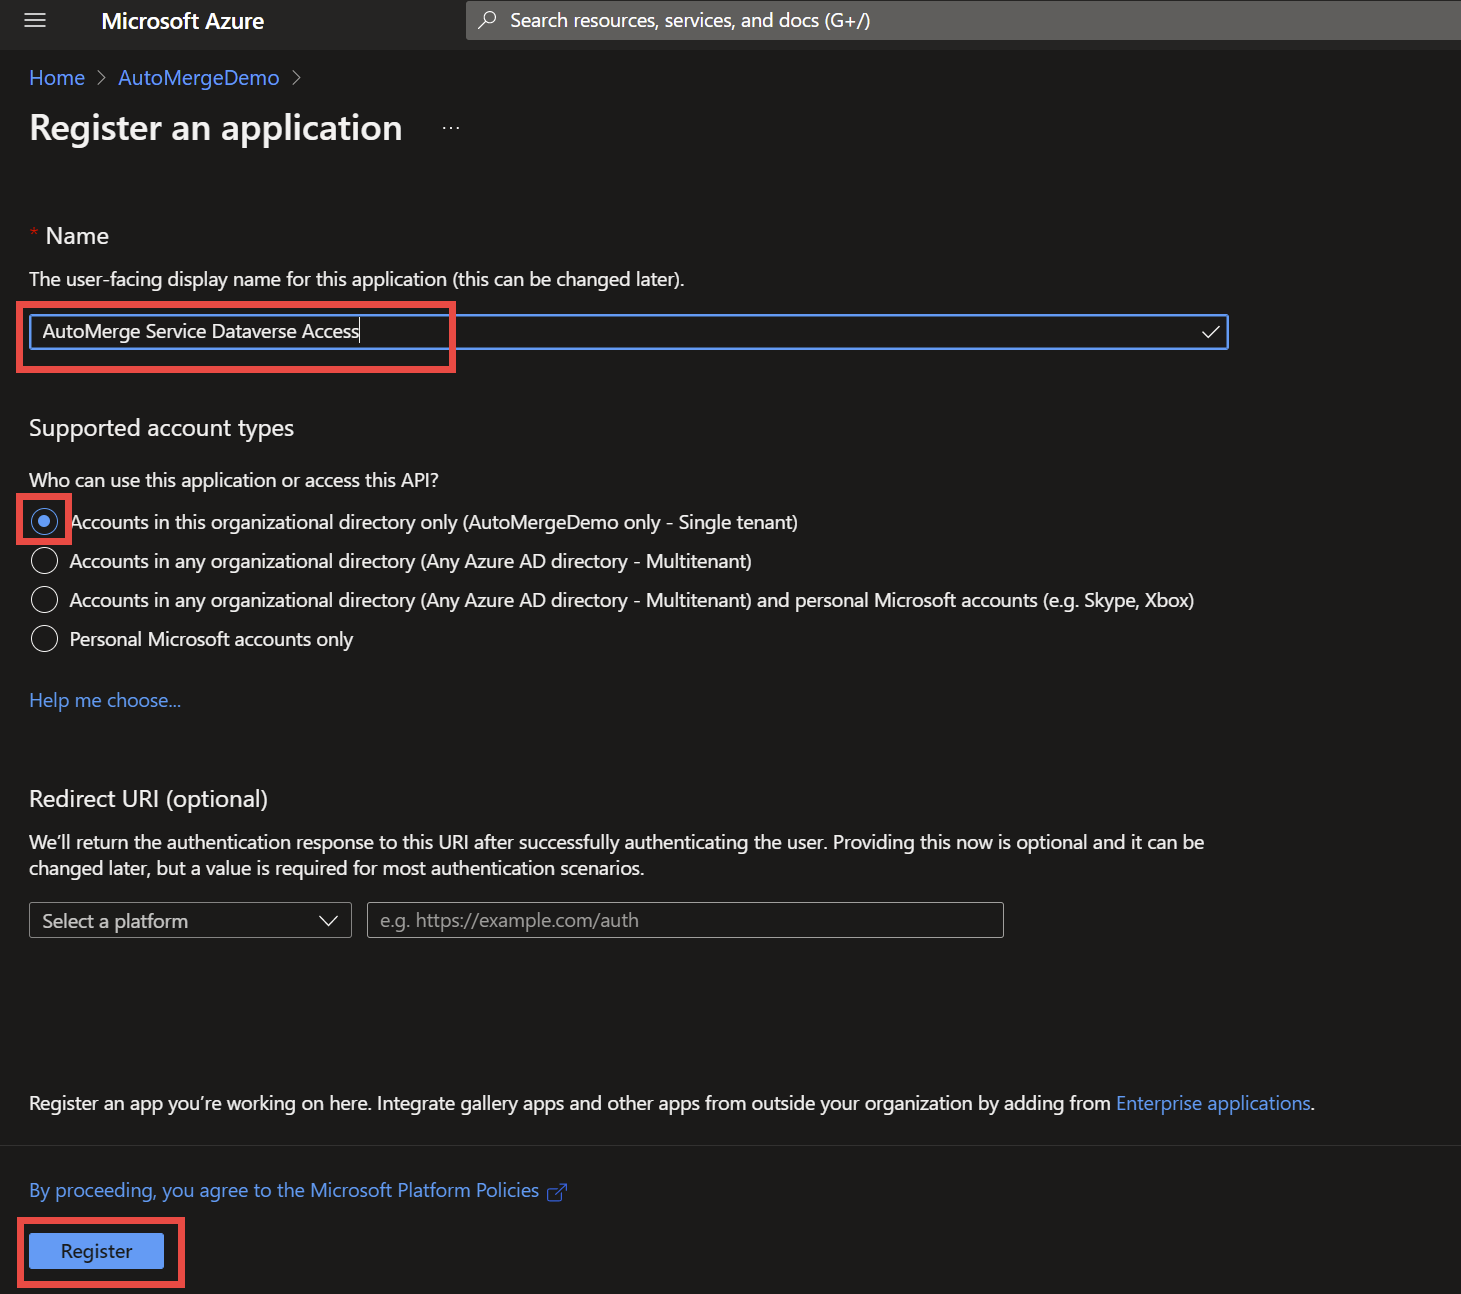
Give the application a descriptive name. Keep the default Single tenant access, skip the Redirect URI section, and click Register.
A-4. Copy the client ID
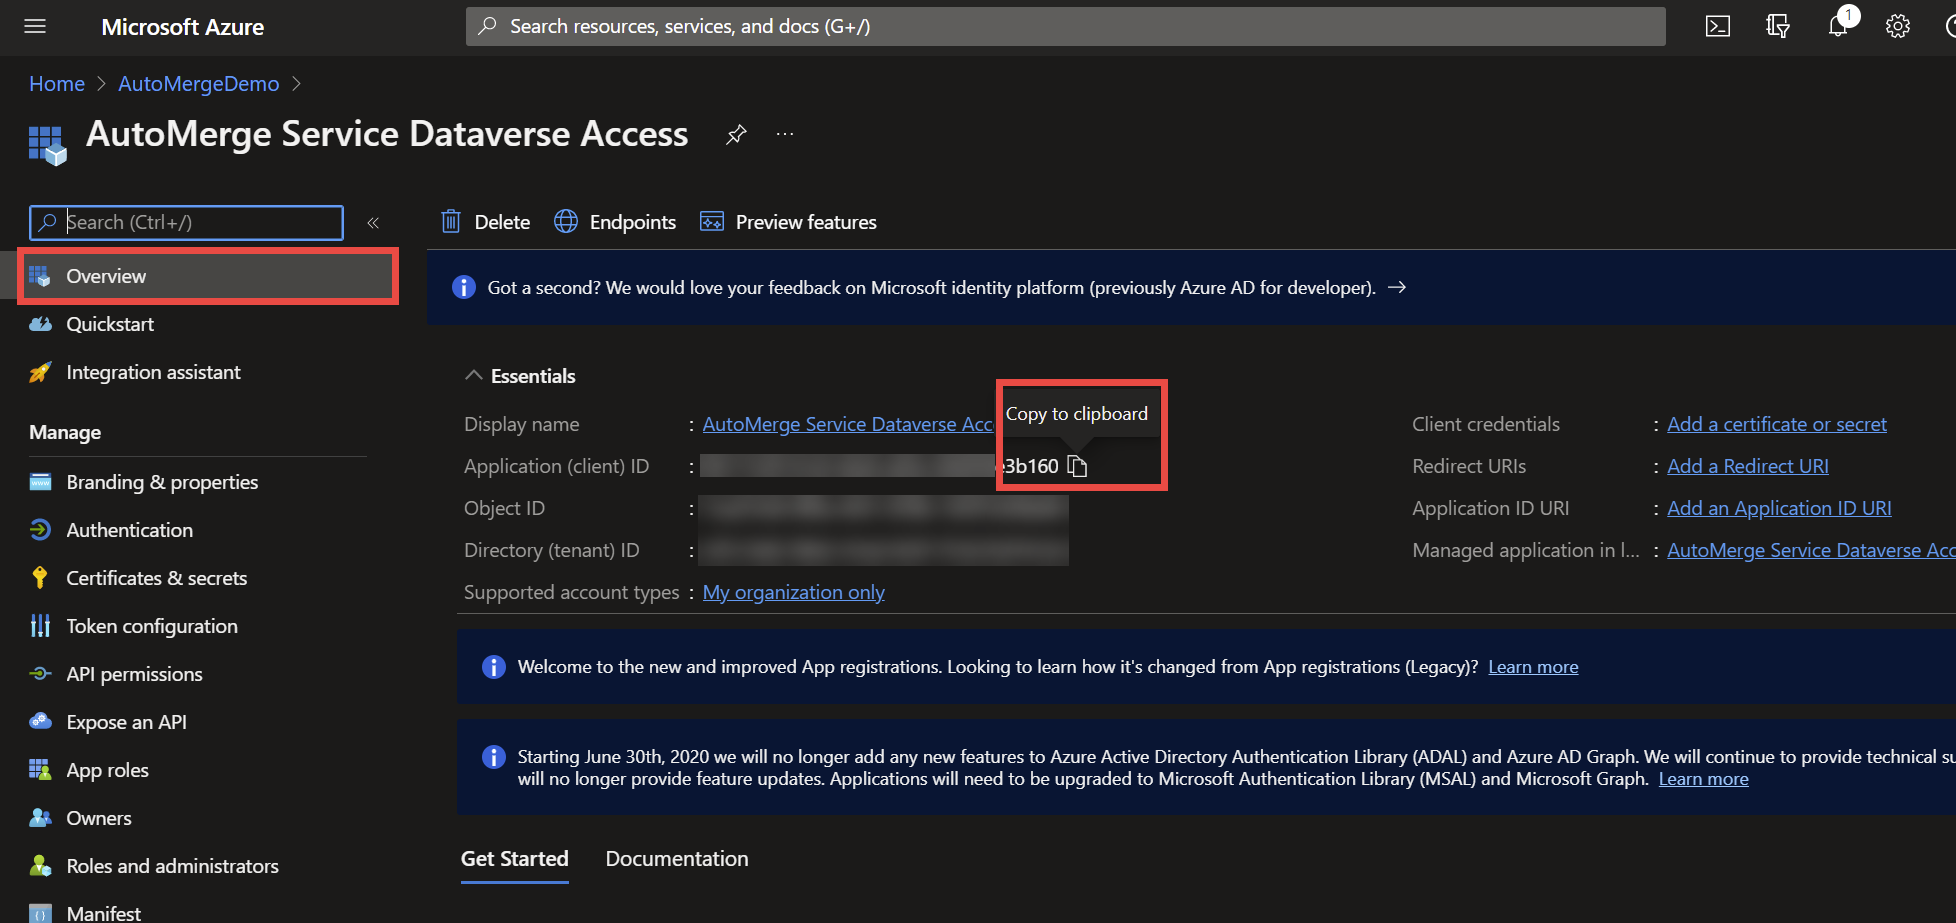
Go to Overview in the left navigation and copy the Application (client) ID somewhere safe. You'll need it in Stage C.
A-5. Add the Dynamics CRM permission
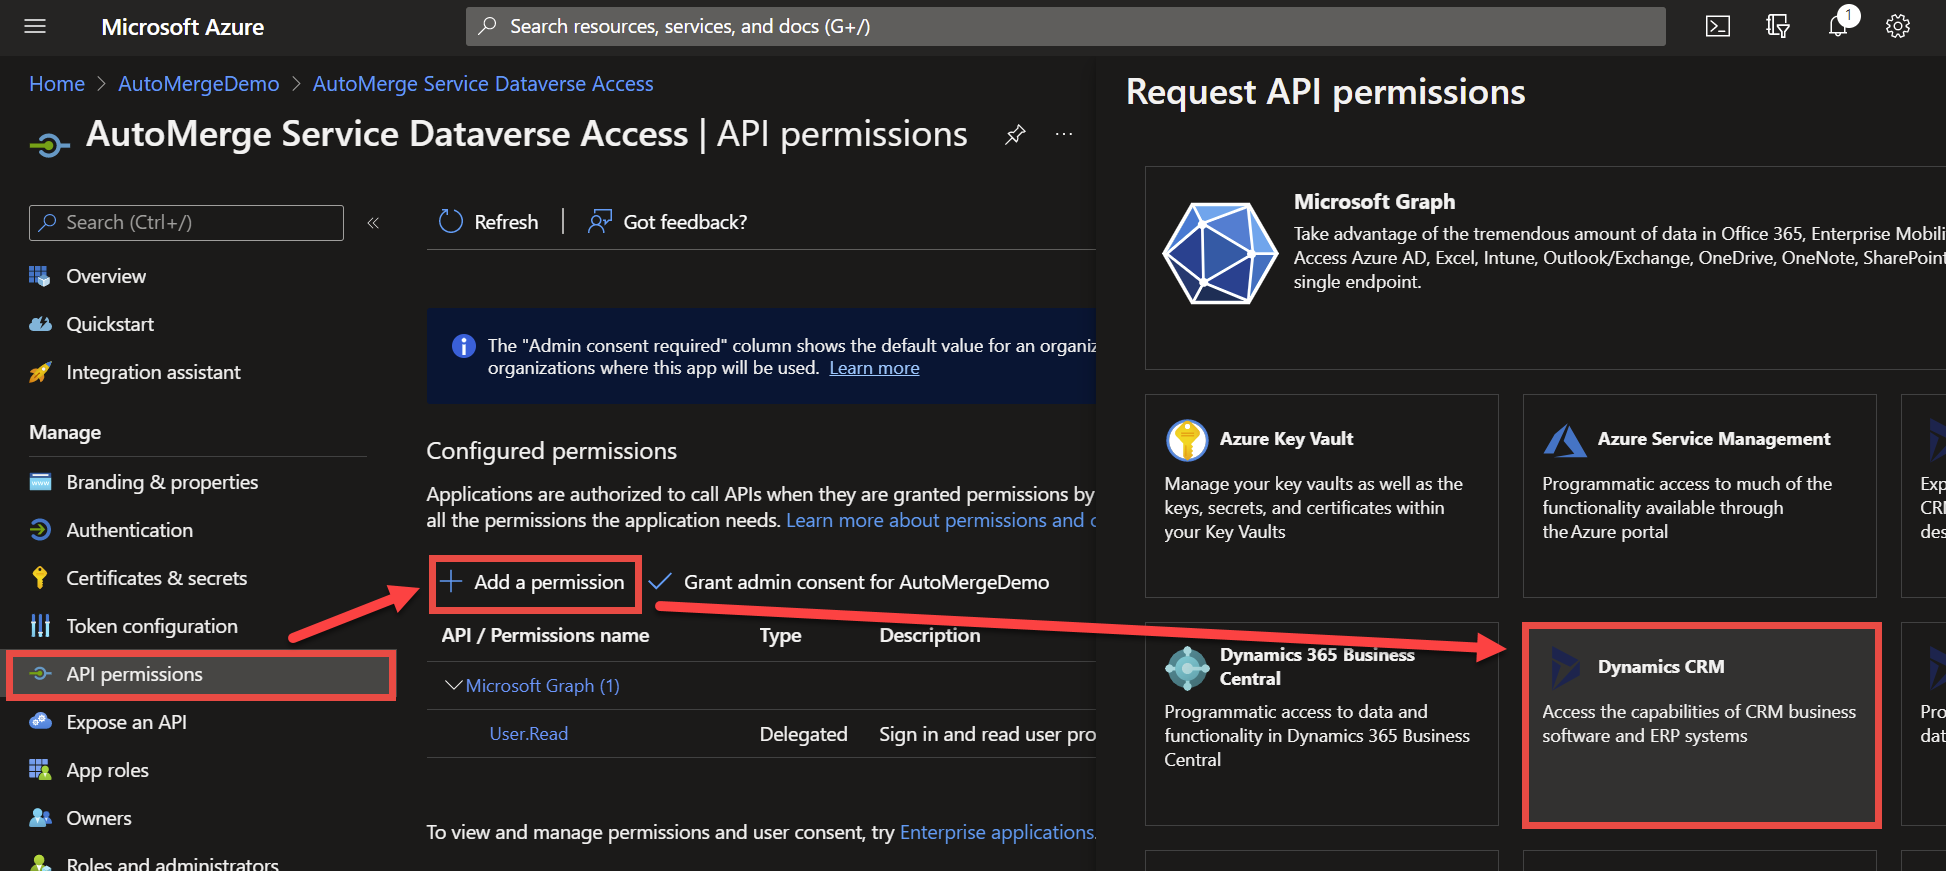
Click API permissions → Add a permission → find Dynamics CRM.
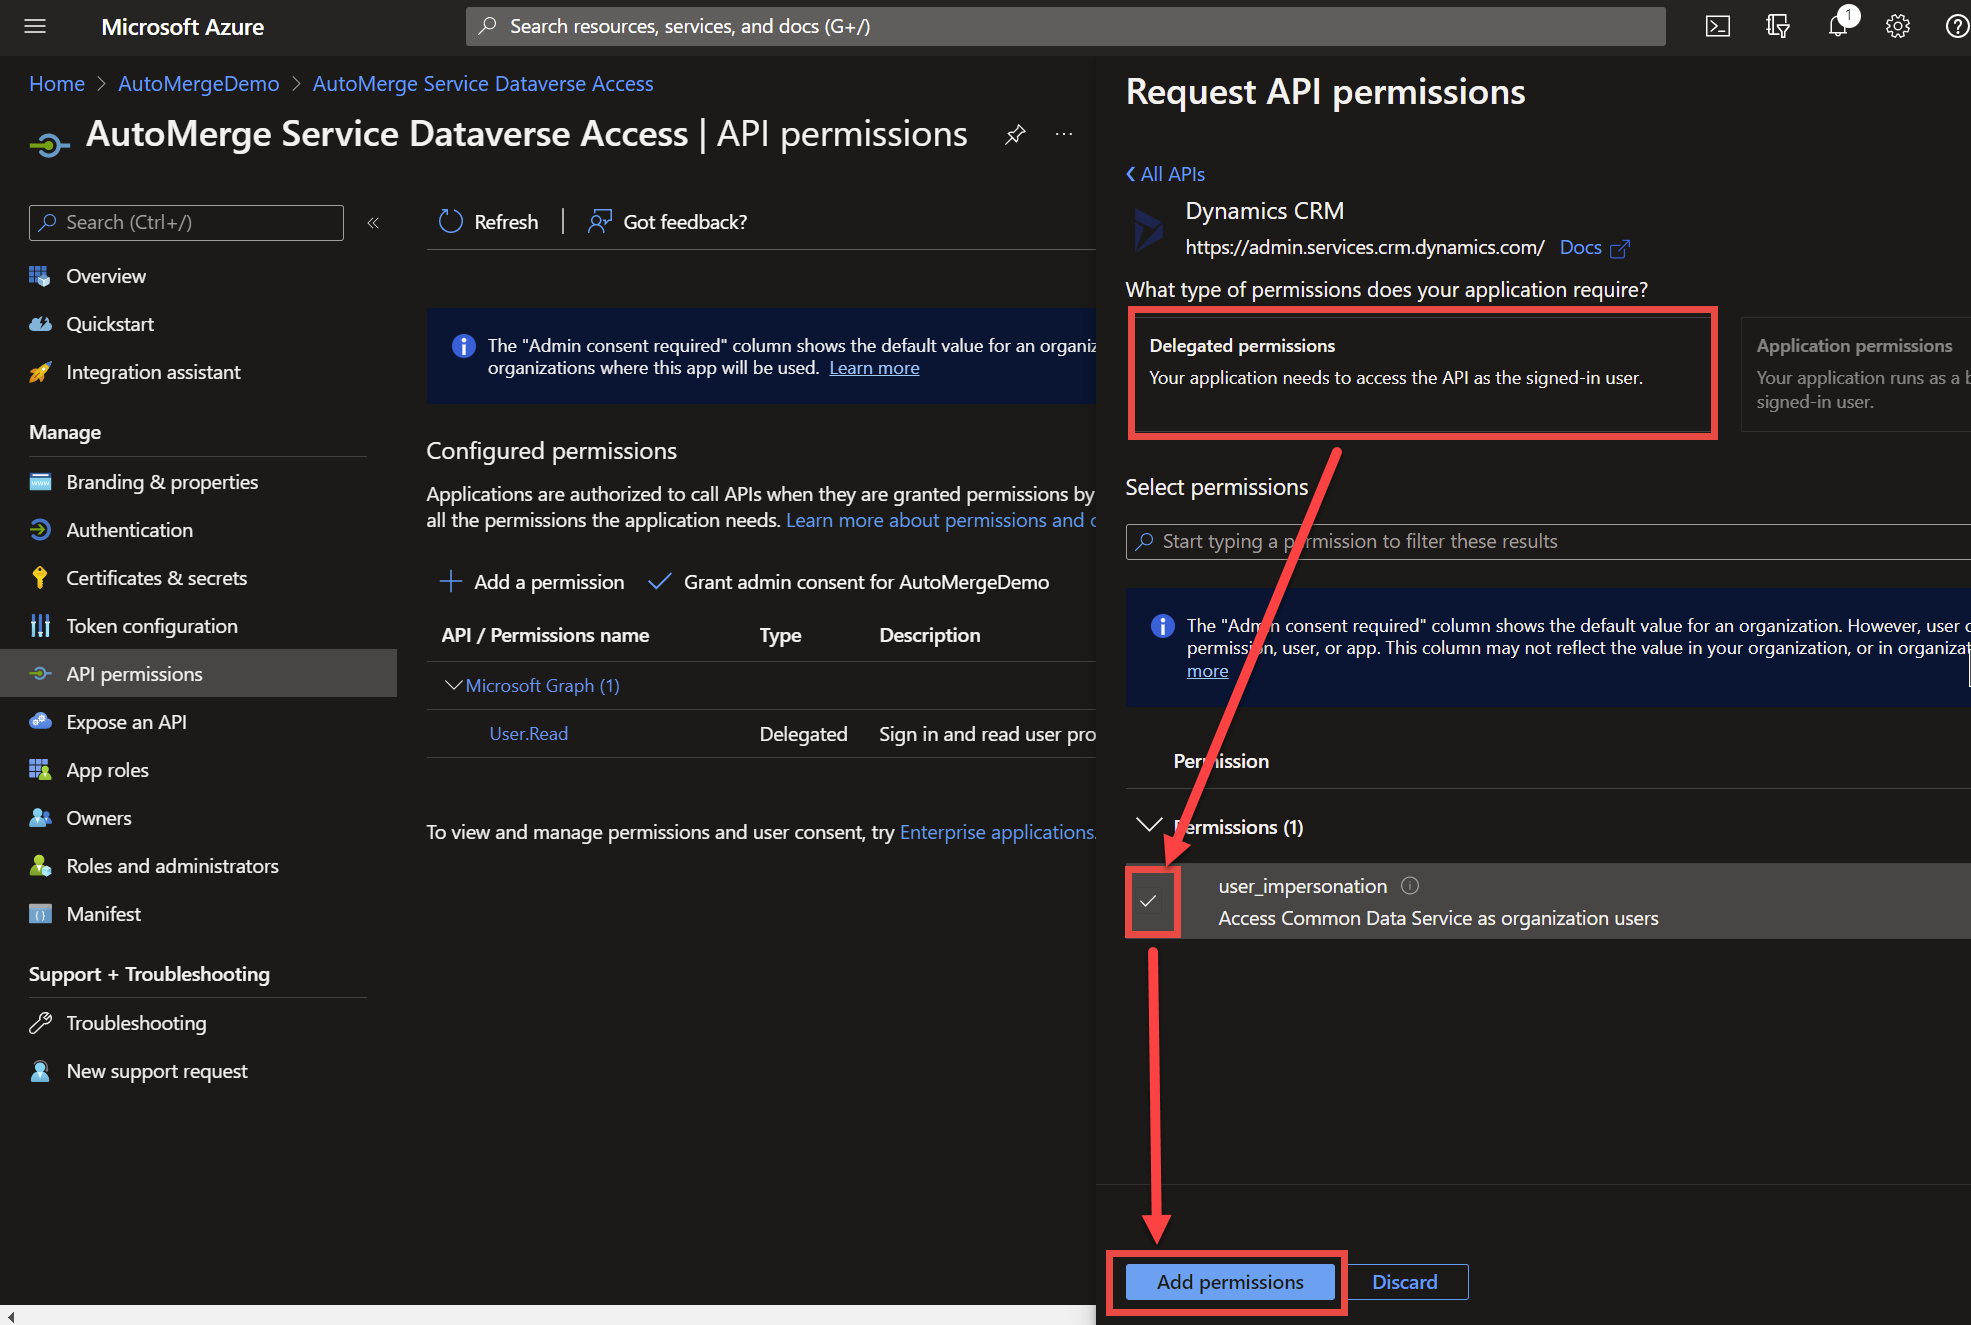
A-6. Grant user_impersonation
In the Request API permissions pane, keep the default Delegated permissions, check user_impersonation, and click Add permissions.
A-7. Grant admin consent
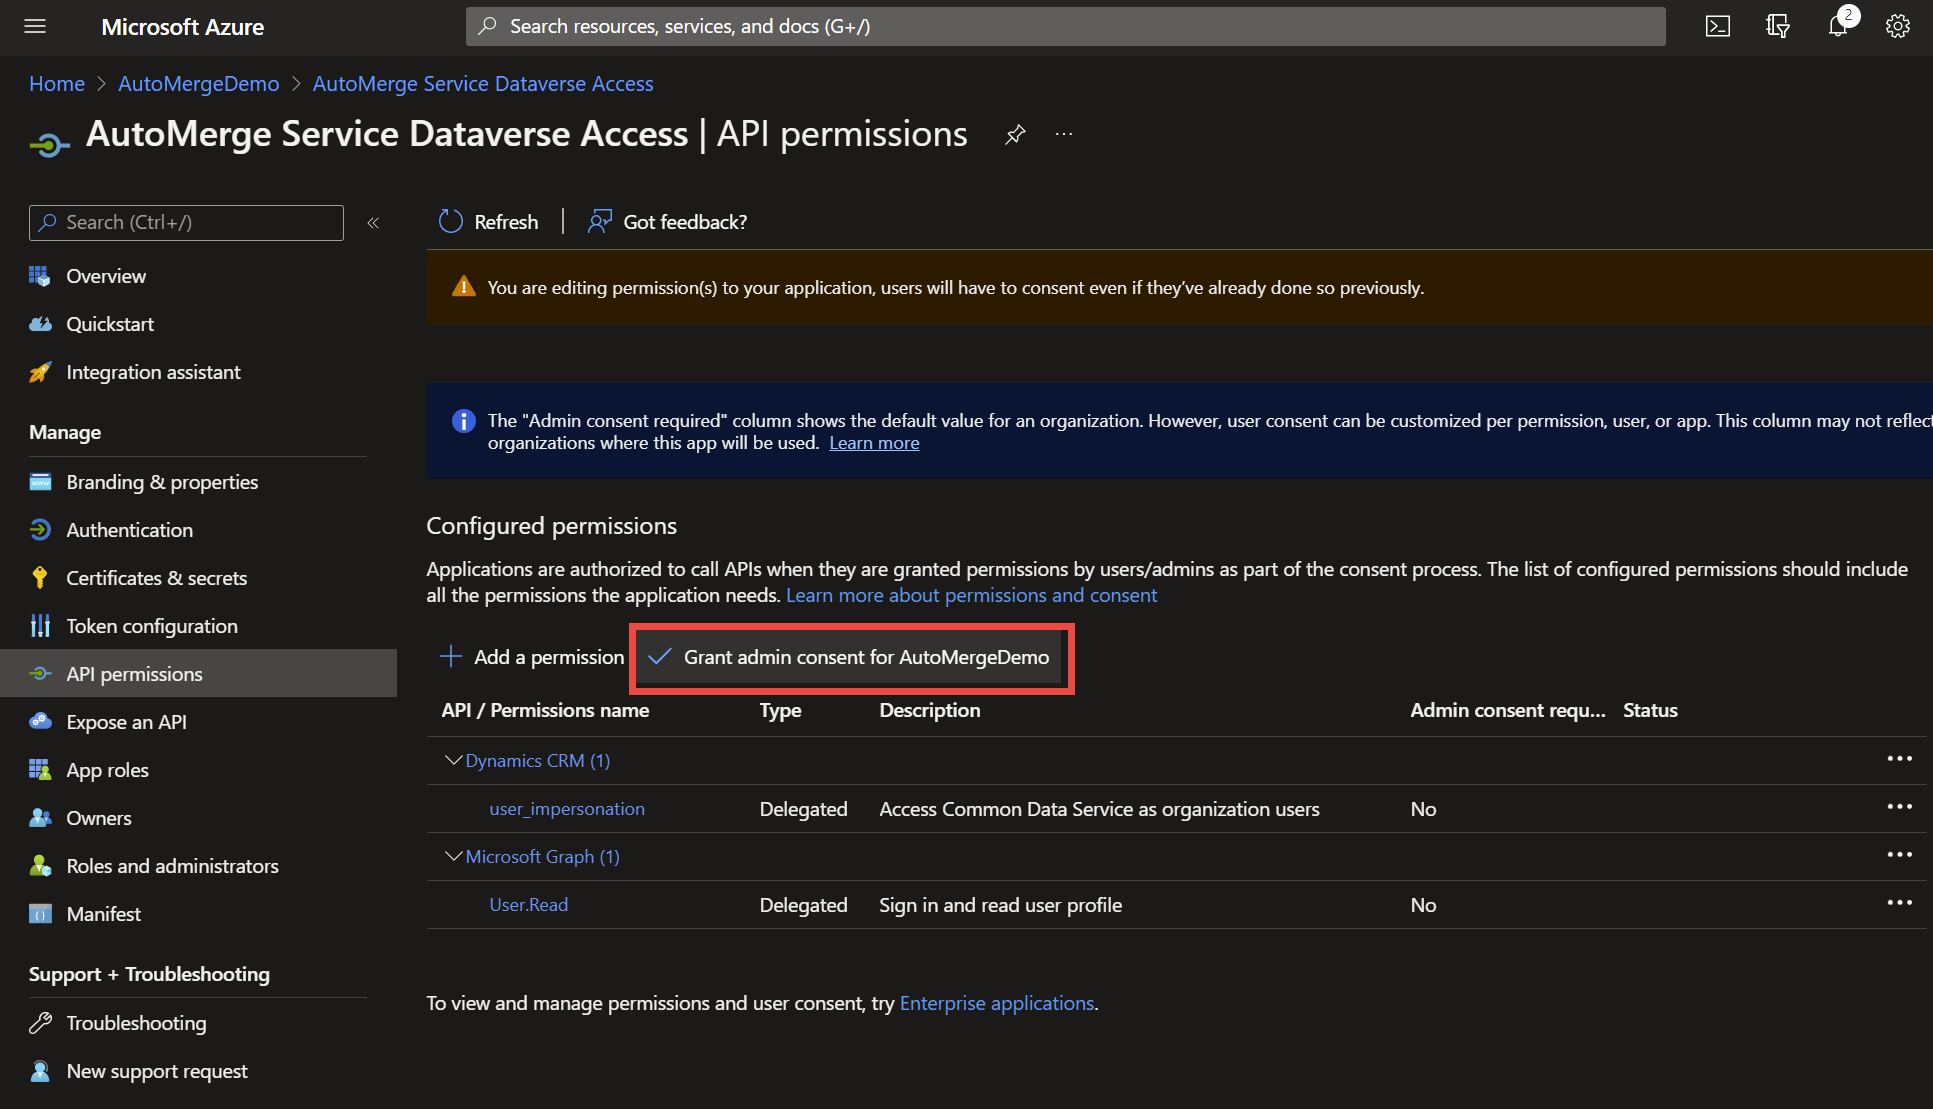
Back in API permissions, click Grant admin consent….
A-8. Create a client secret
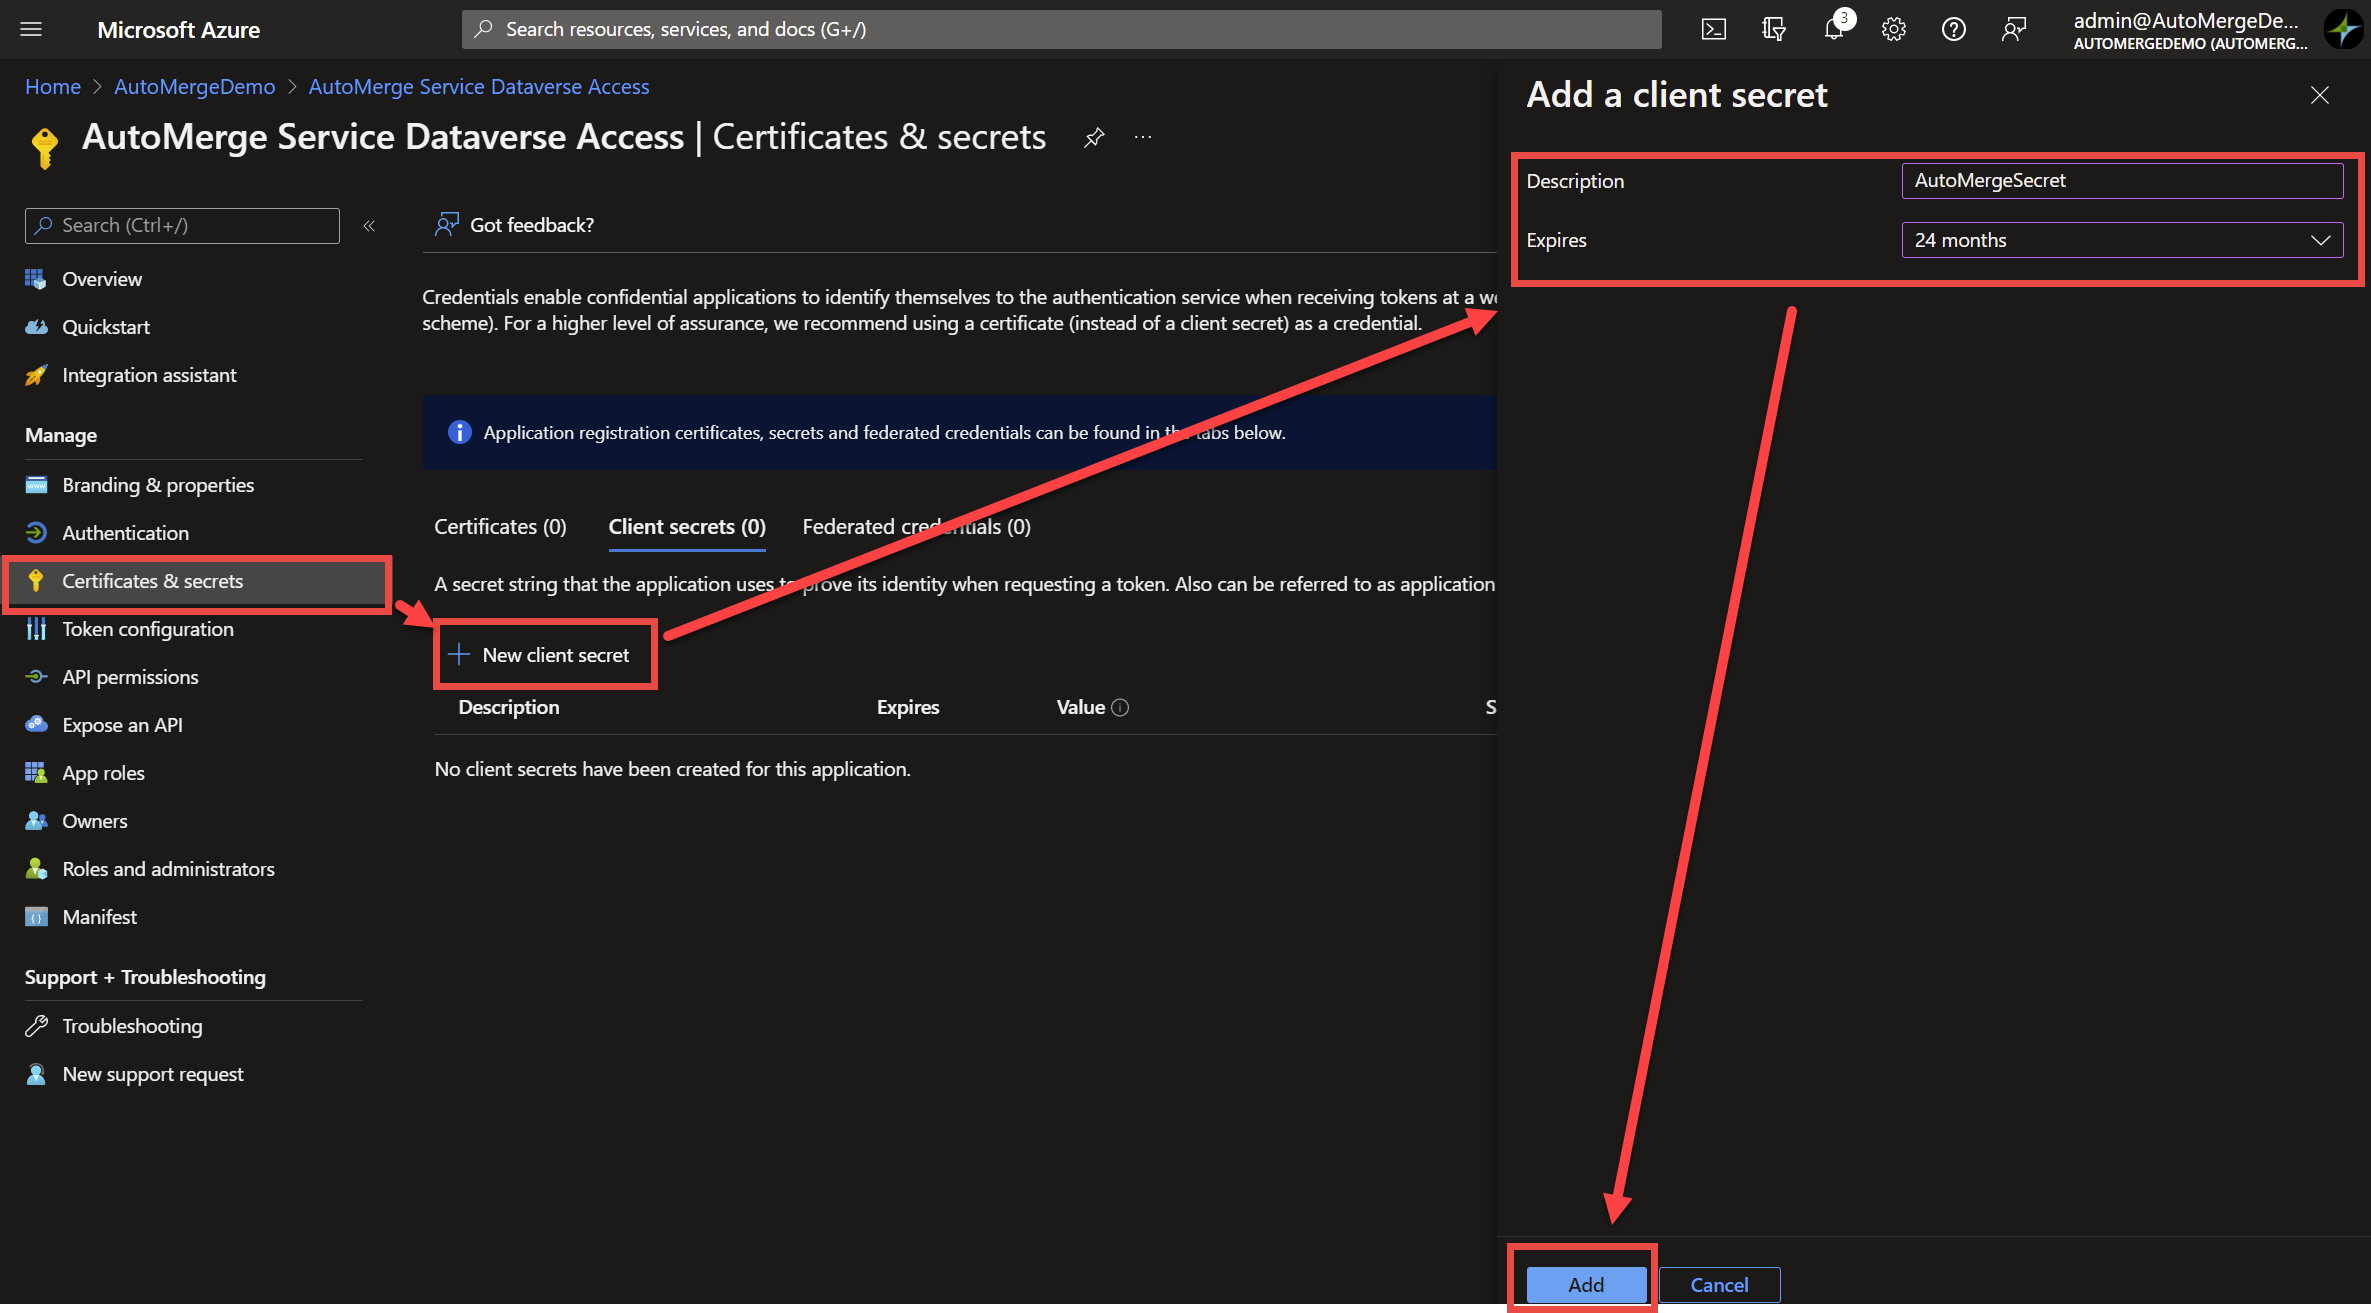
Go to Certificates & secrets → New client secret. Give it a descriptive name and an expiration at least 12 months out, since AutoMerge subscriptions typically run 12 months.
A-9. Save the secret value now
Find the new secret and copy its Value. This is the equivalent of a password and you'll need it in Stage C.
Once you browse away from this page the value is no longer visible. Copy it before you navigate anywhere else.
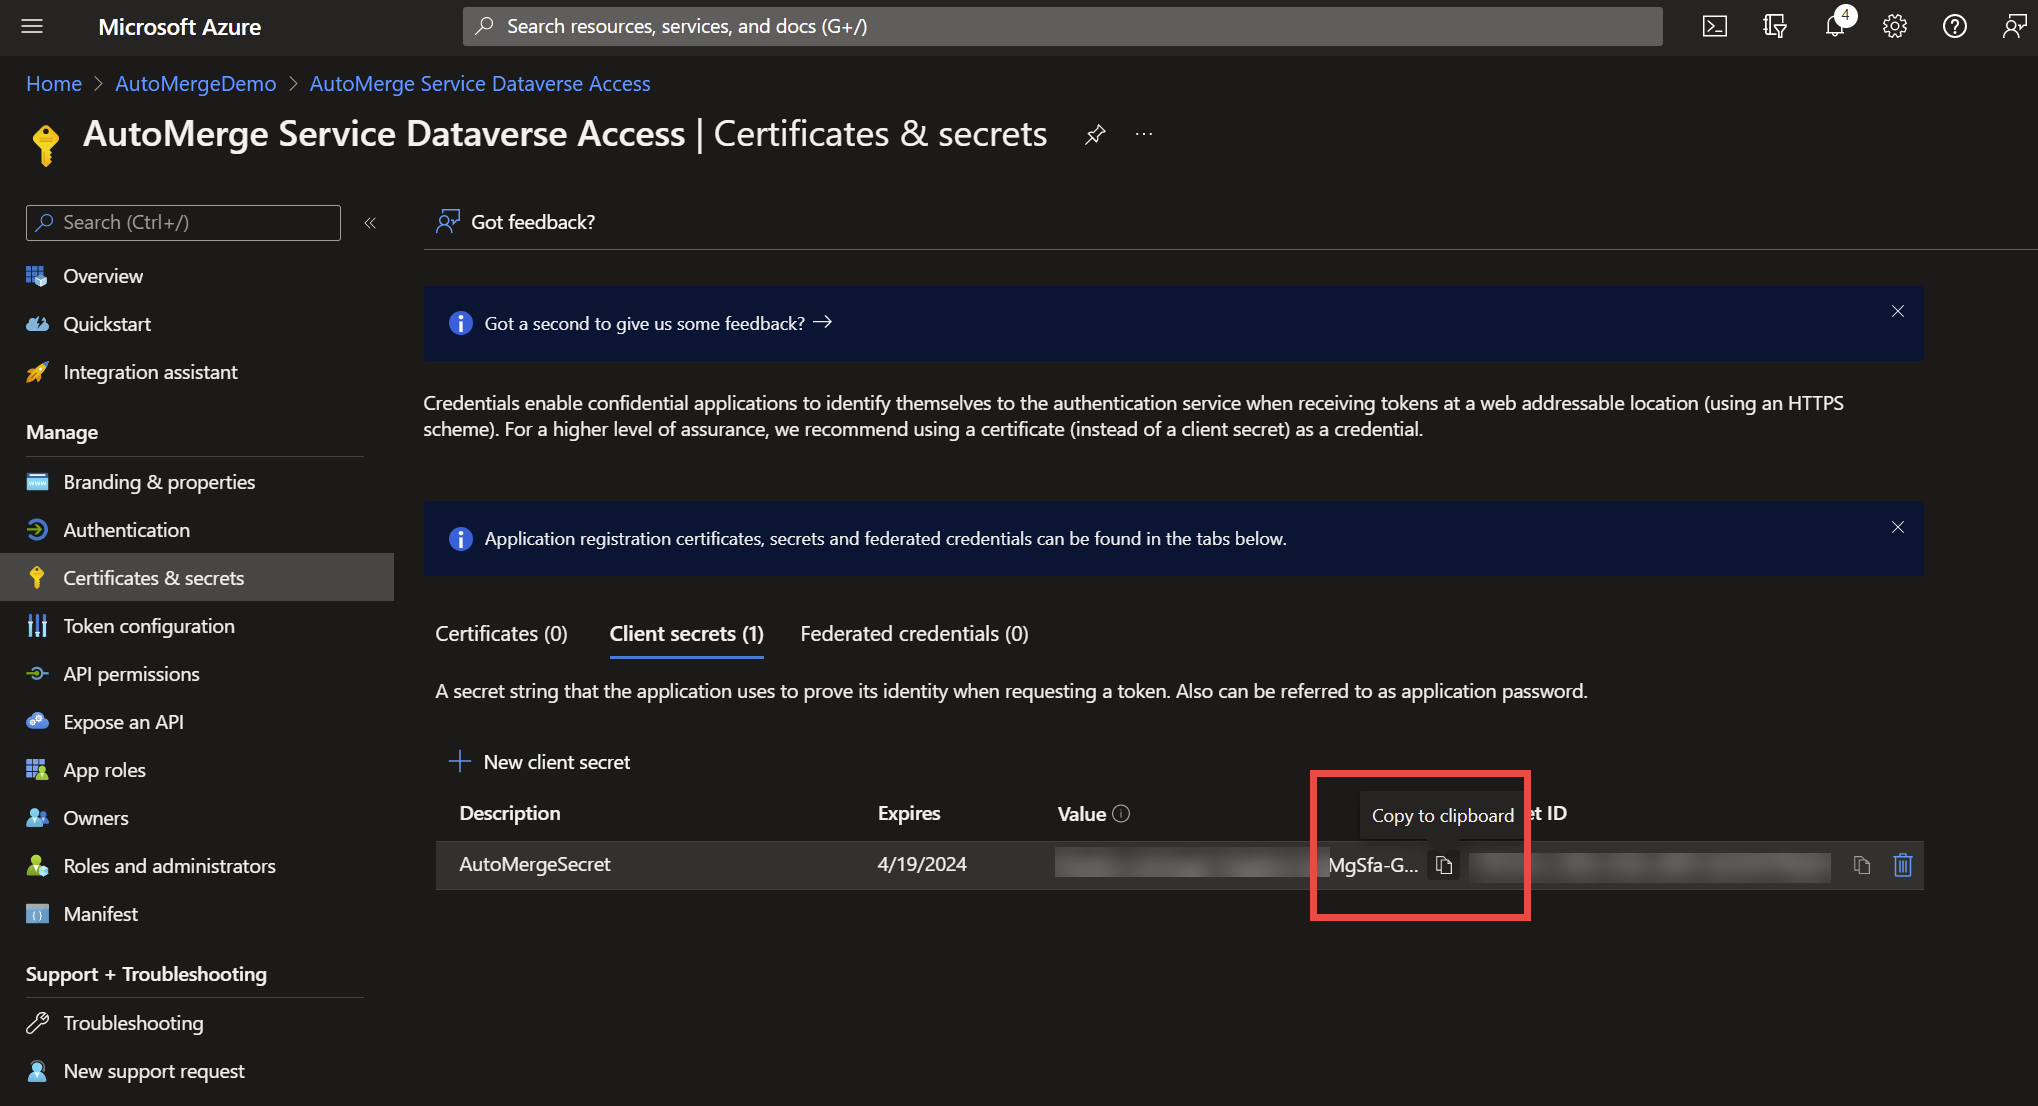
Note the secret's expiration date and set a reminder one month before it. When a secret expires, the AutoMerge analysis service stops working.
If your secret has already expired, you only need to create a new secret and update it in the connection verify page (Stage C). You do not need a new app registration or a new application user.
Stage B. Power Platform setup
Unlike Stage A, repeat this for every CRM organization the AutoMerge service needs to reach: Production, Sandbox/Dev, Sandbox/Test, and so on.
Sign in to admin.powerplatform.microsoft.com as someone with Power Platform Admin privileges.
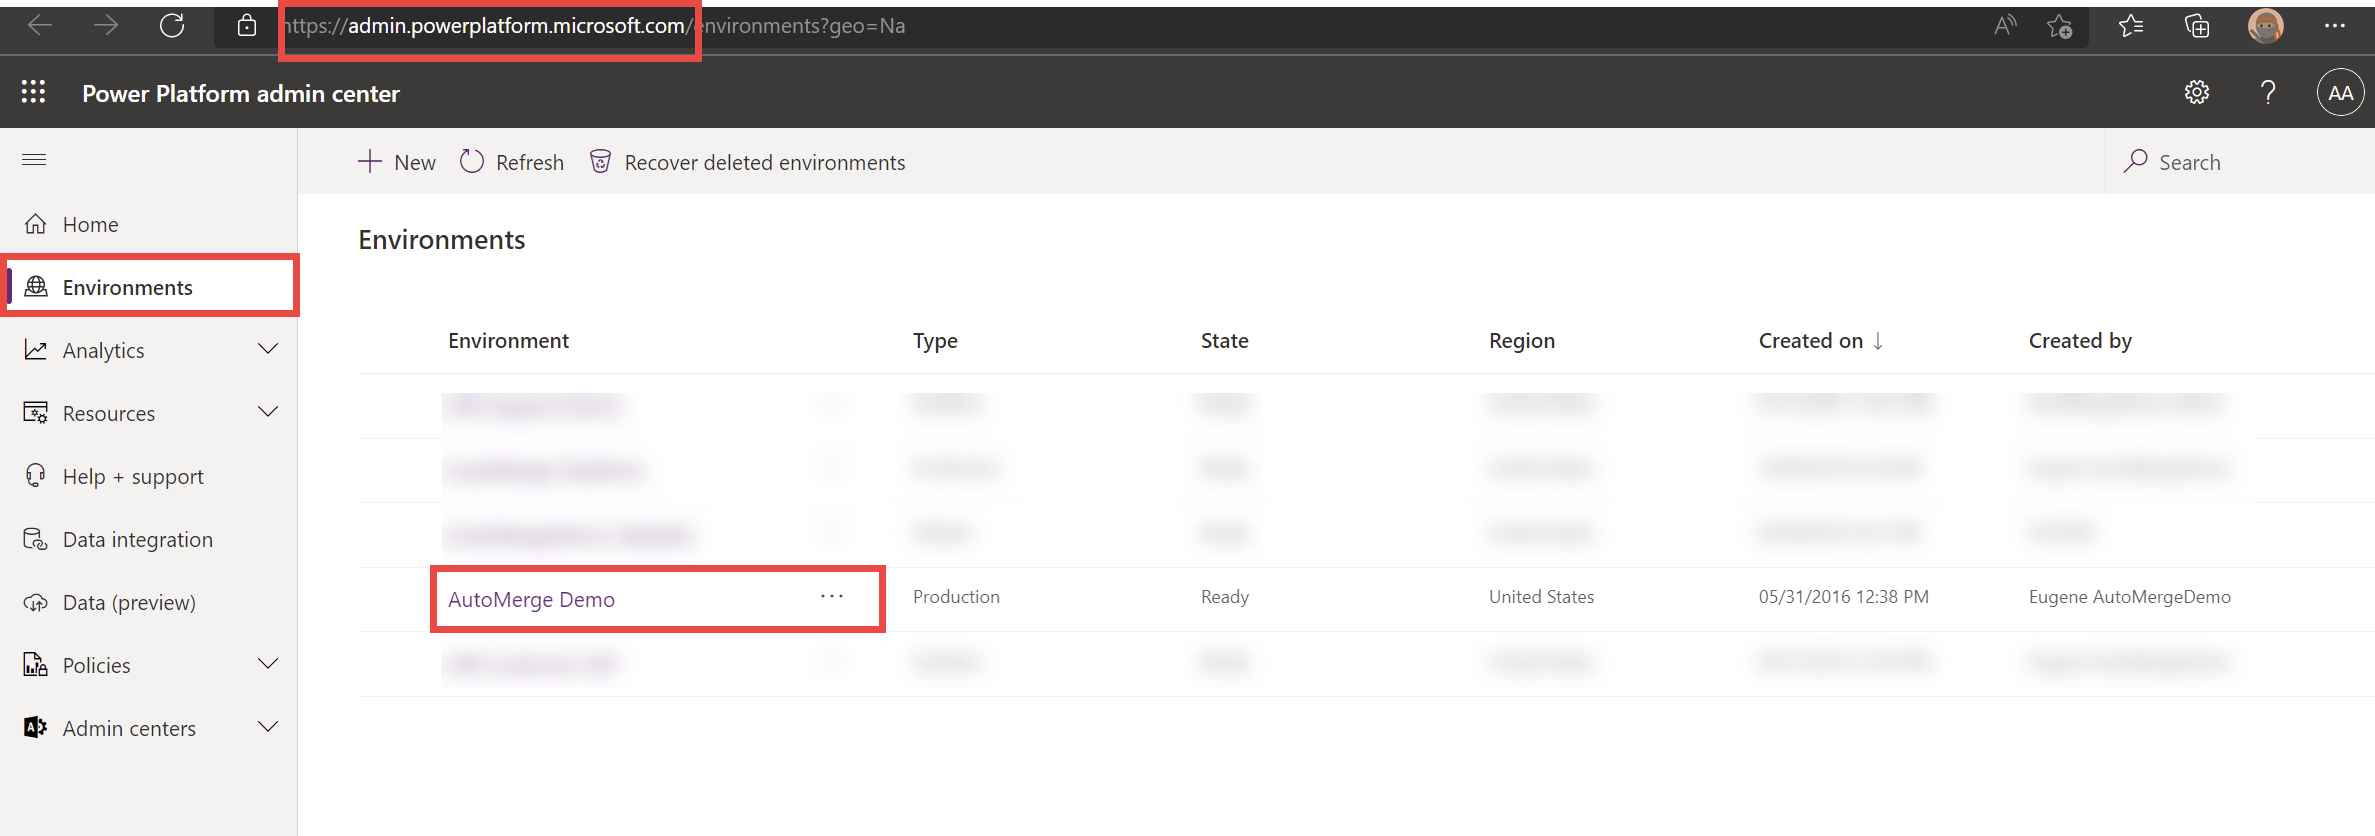
B-1. Select the environment
In the Environments navigation, locate and select the environment (your CRM organization).
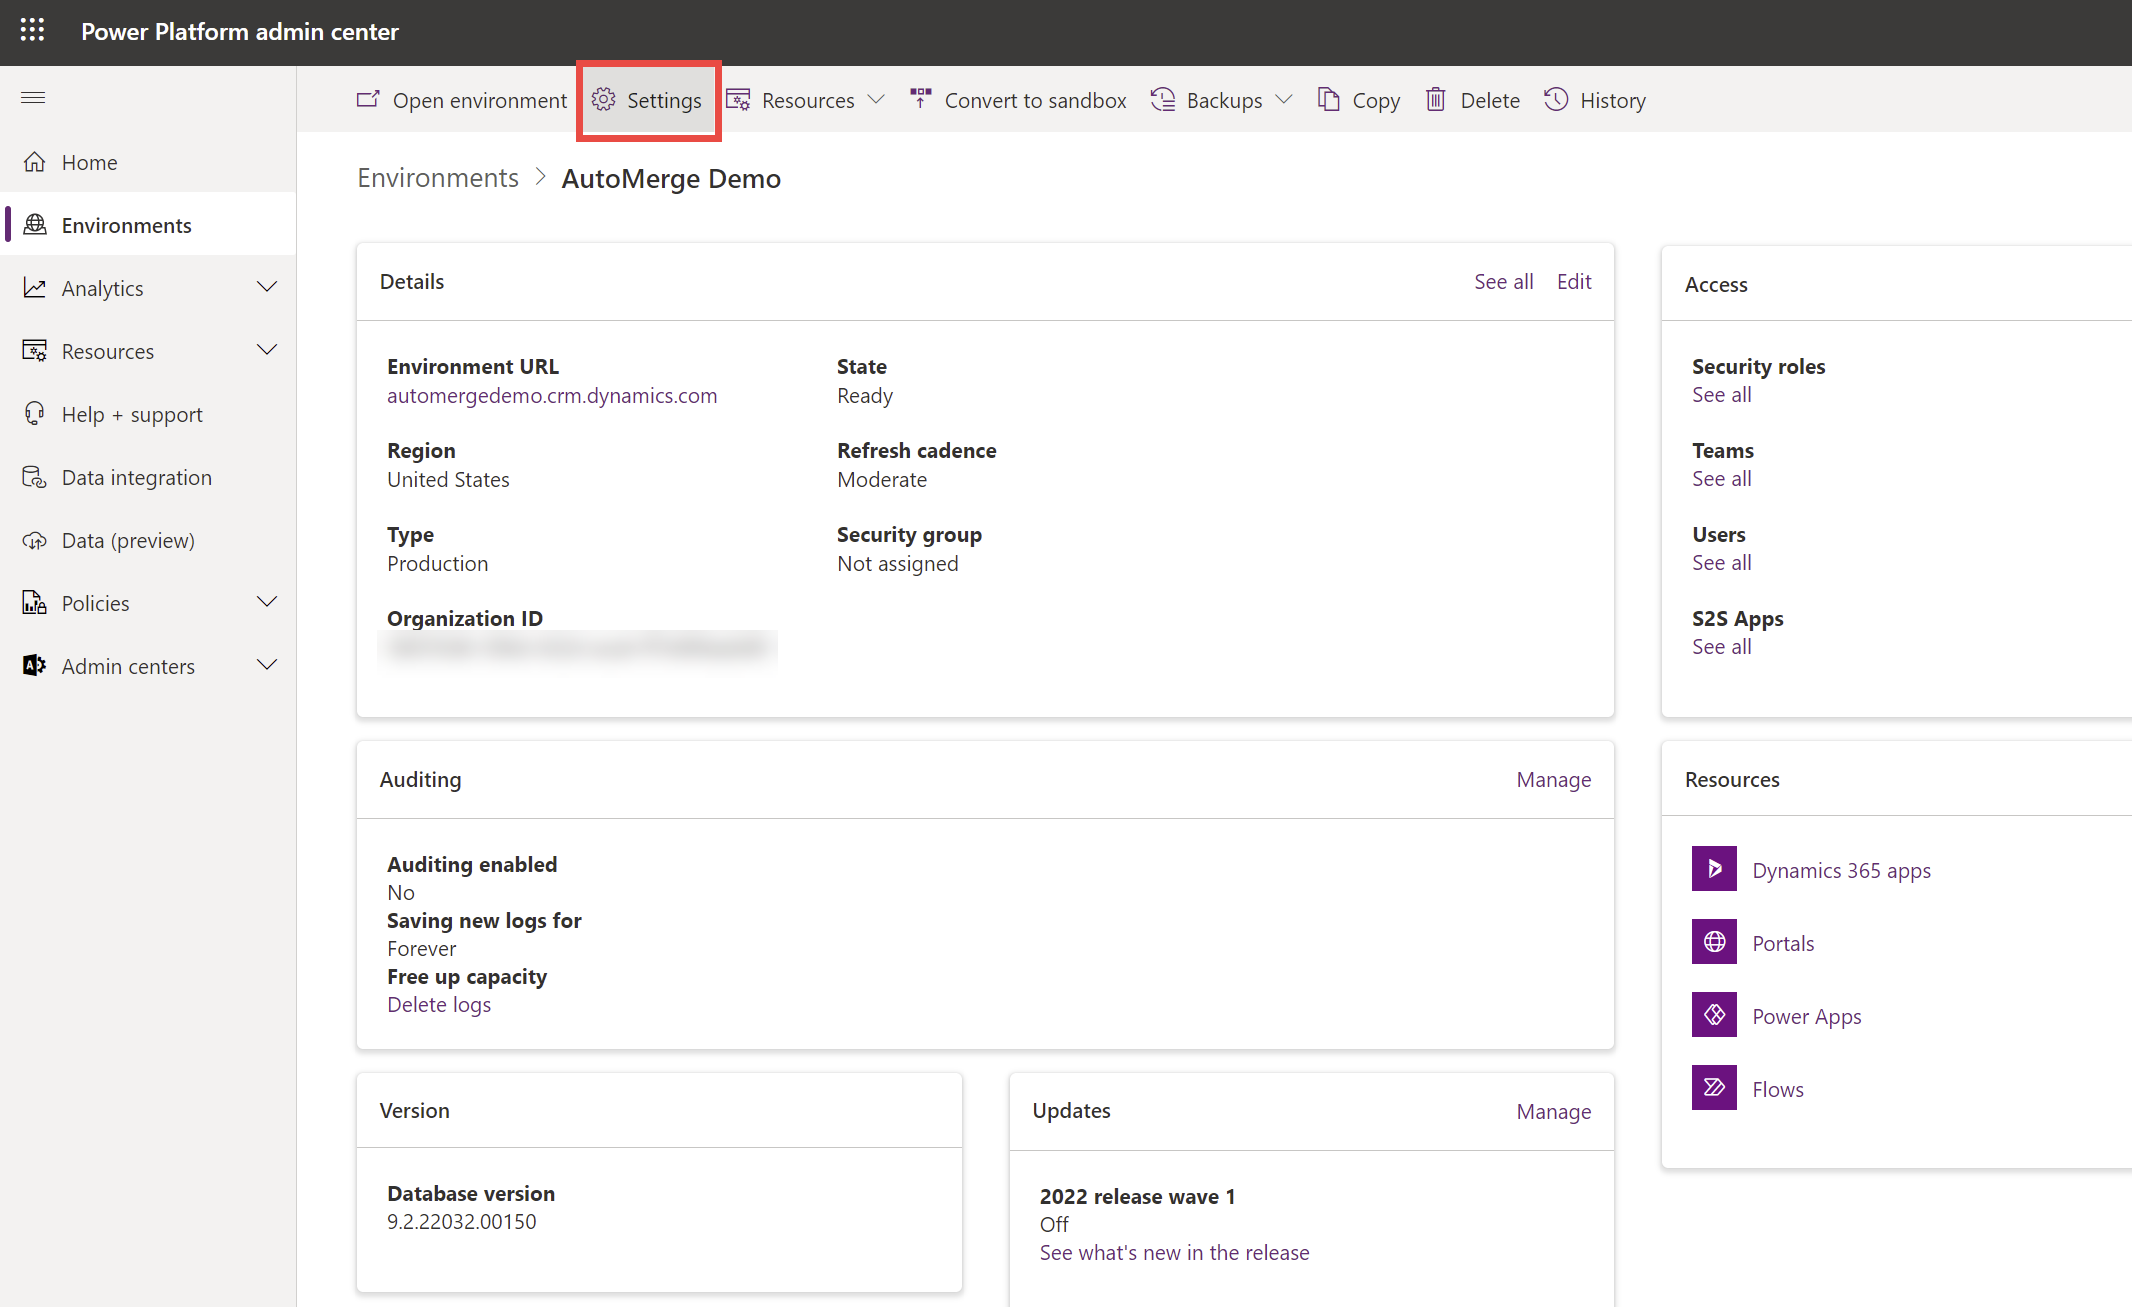
B-2. Open Settings
Click the Settings button at the top of the environment.
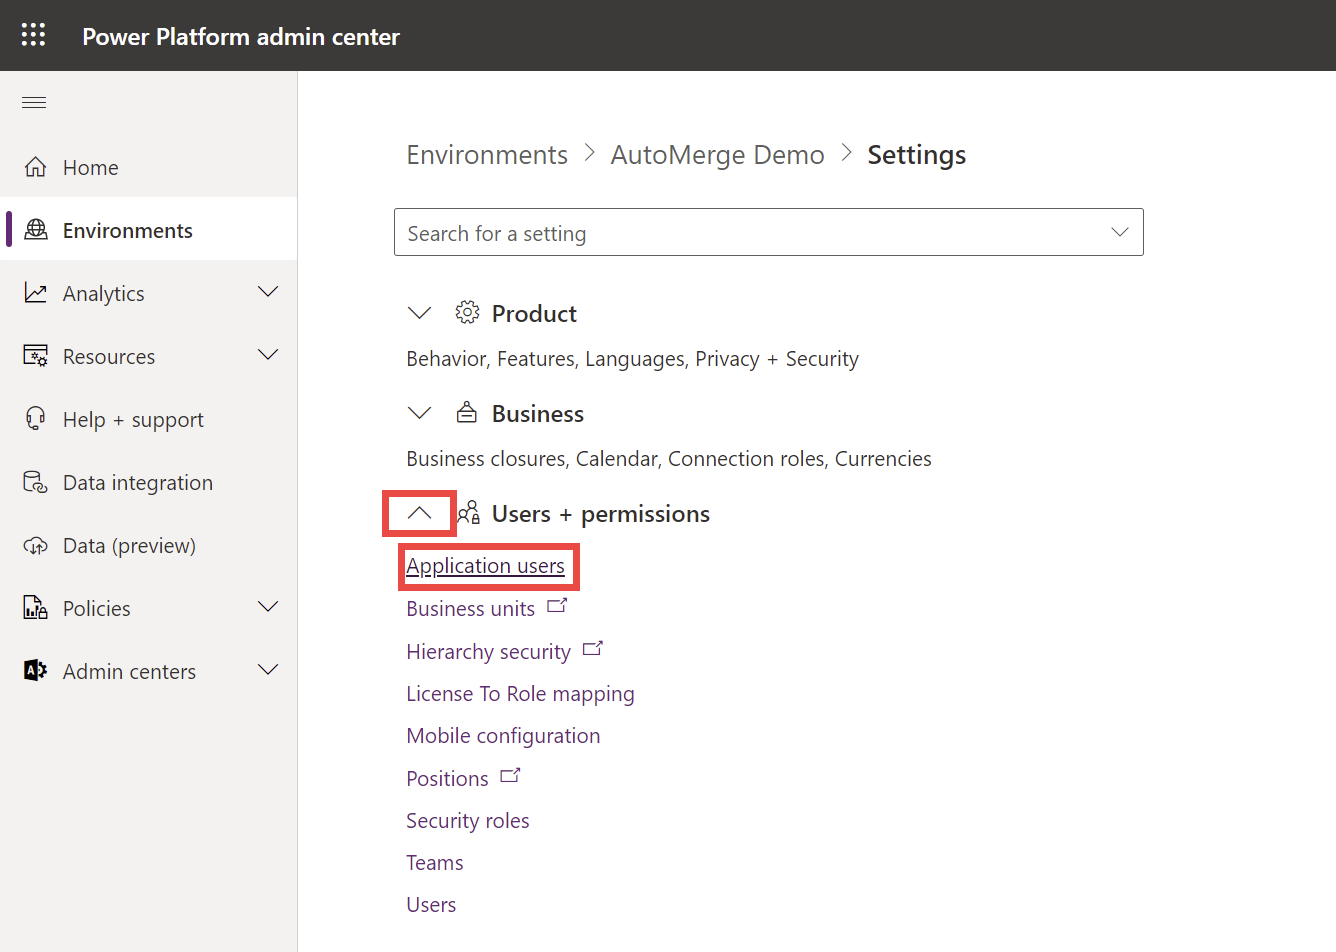
B-3. Application users
Expand Users + permissions and click Application users.
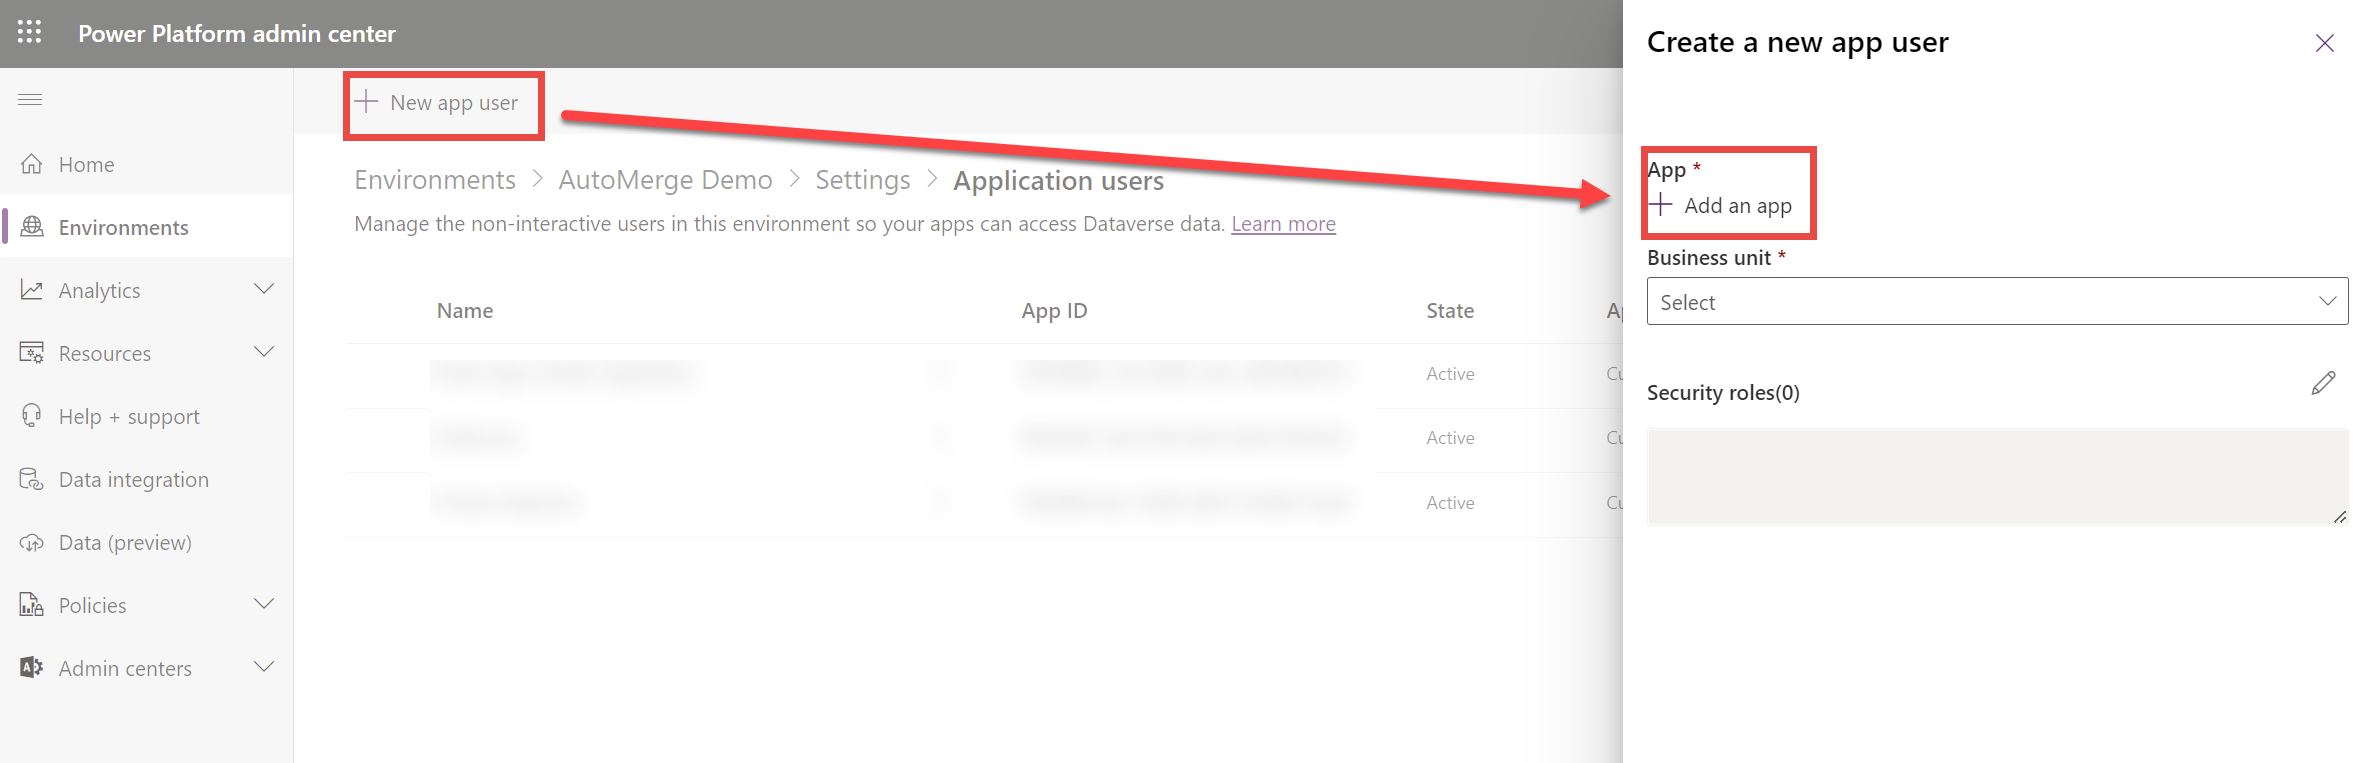
B-4. New app user
Click + New app user, then in the right-hand pane click + Add an app.
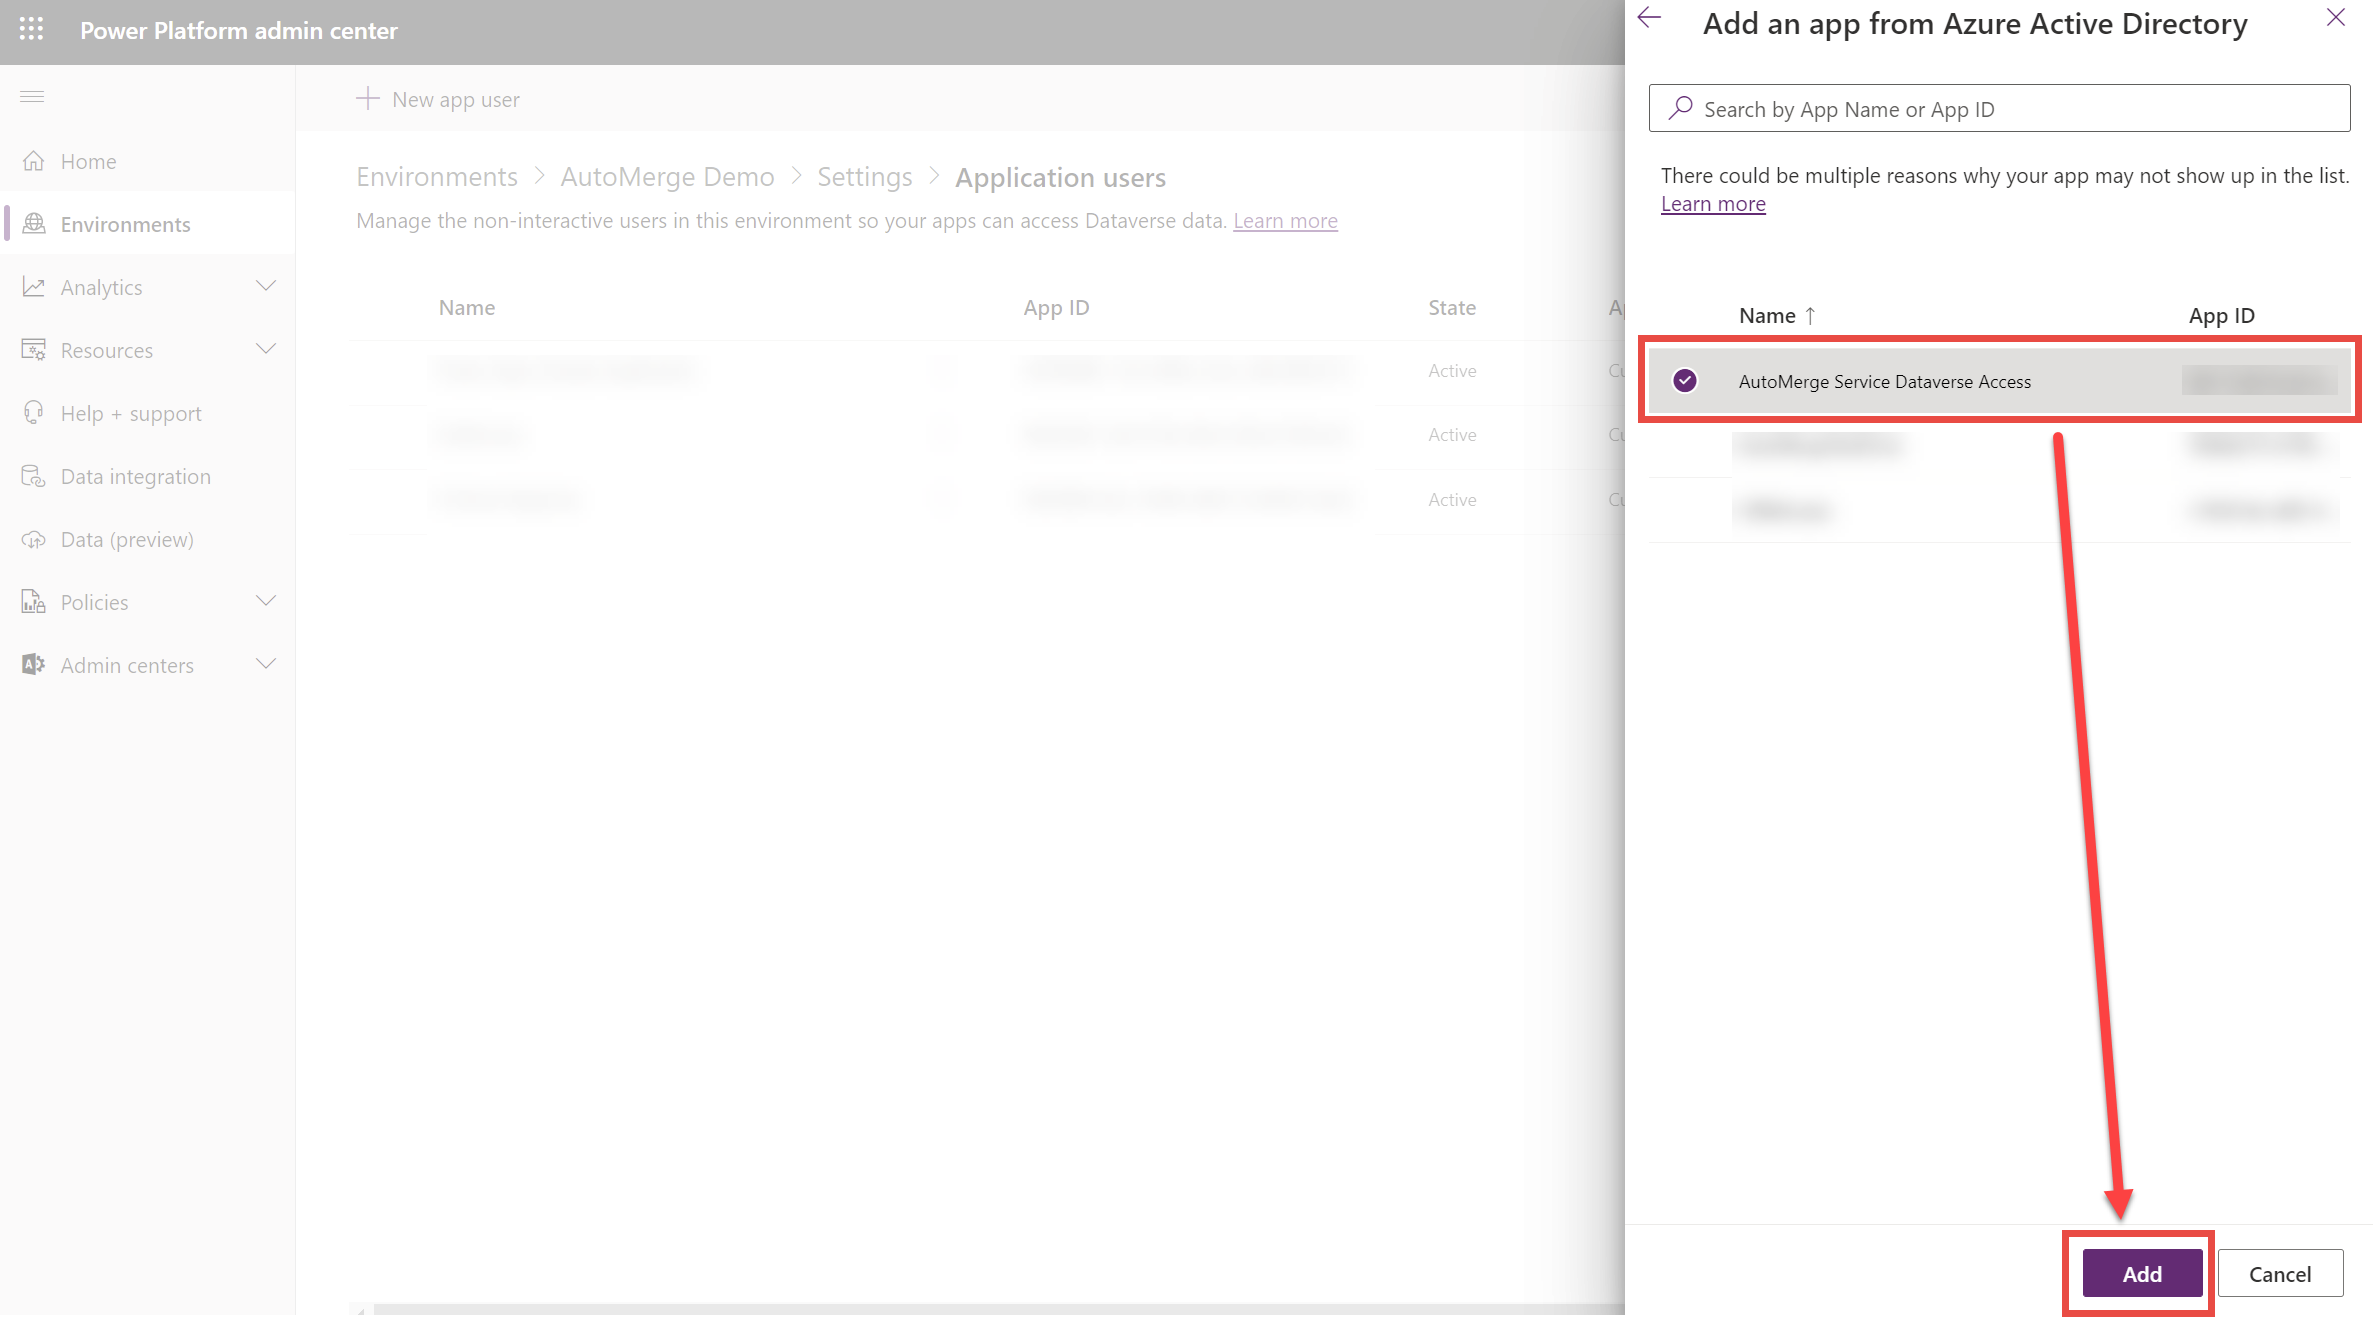
B-5. Select your Azure app
Look up and select the app you registered in Stage A, then click Add.
B-6. Business unit and security role
Select a Business Unit (typically your root unit) and choose the AutoMerge Analysis/Tagging AppUser - Minimum Privs security role, which ships with the AutoMerge Managed Solution.
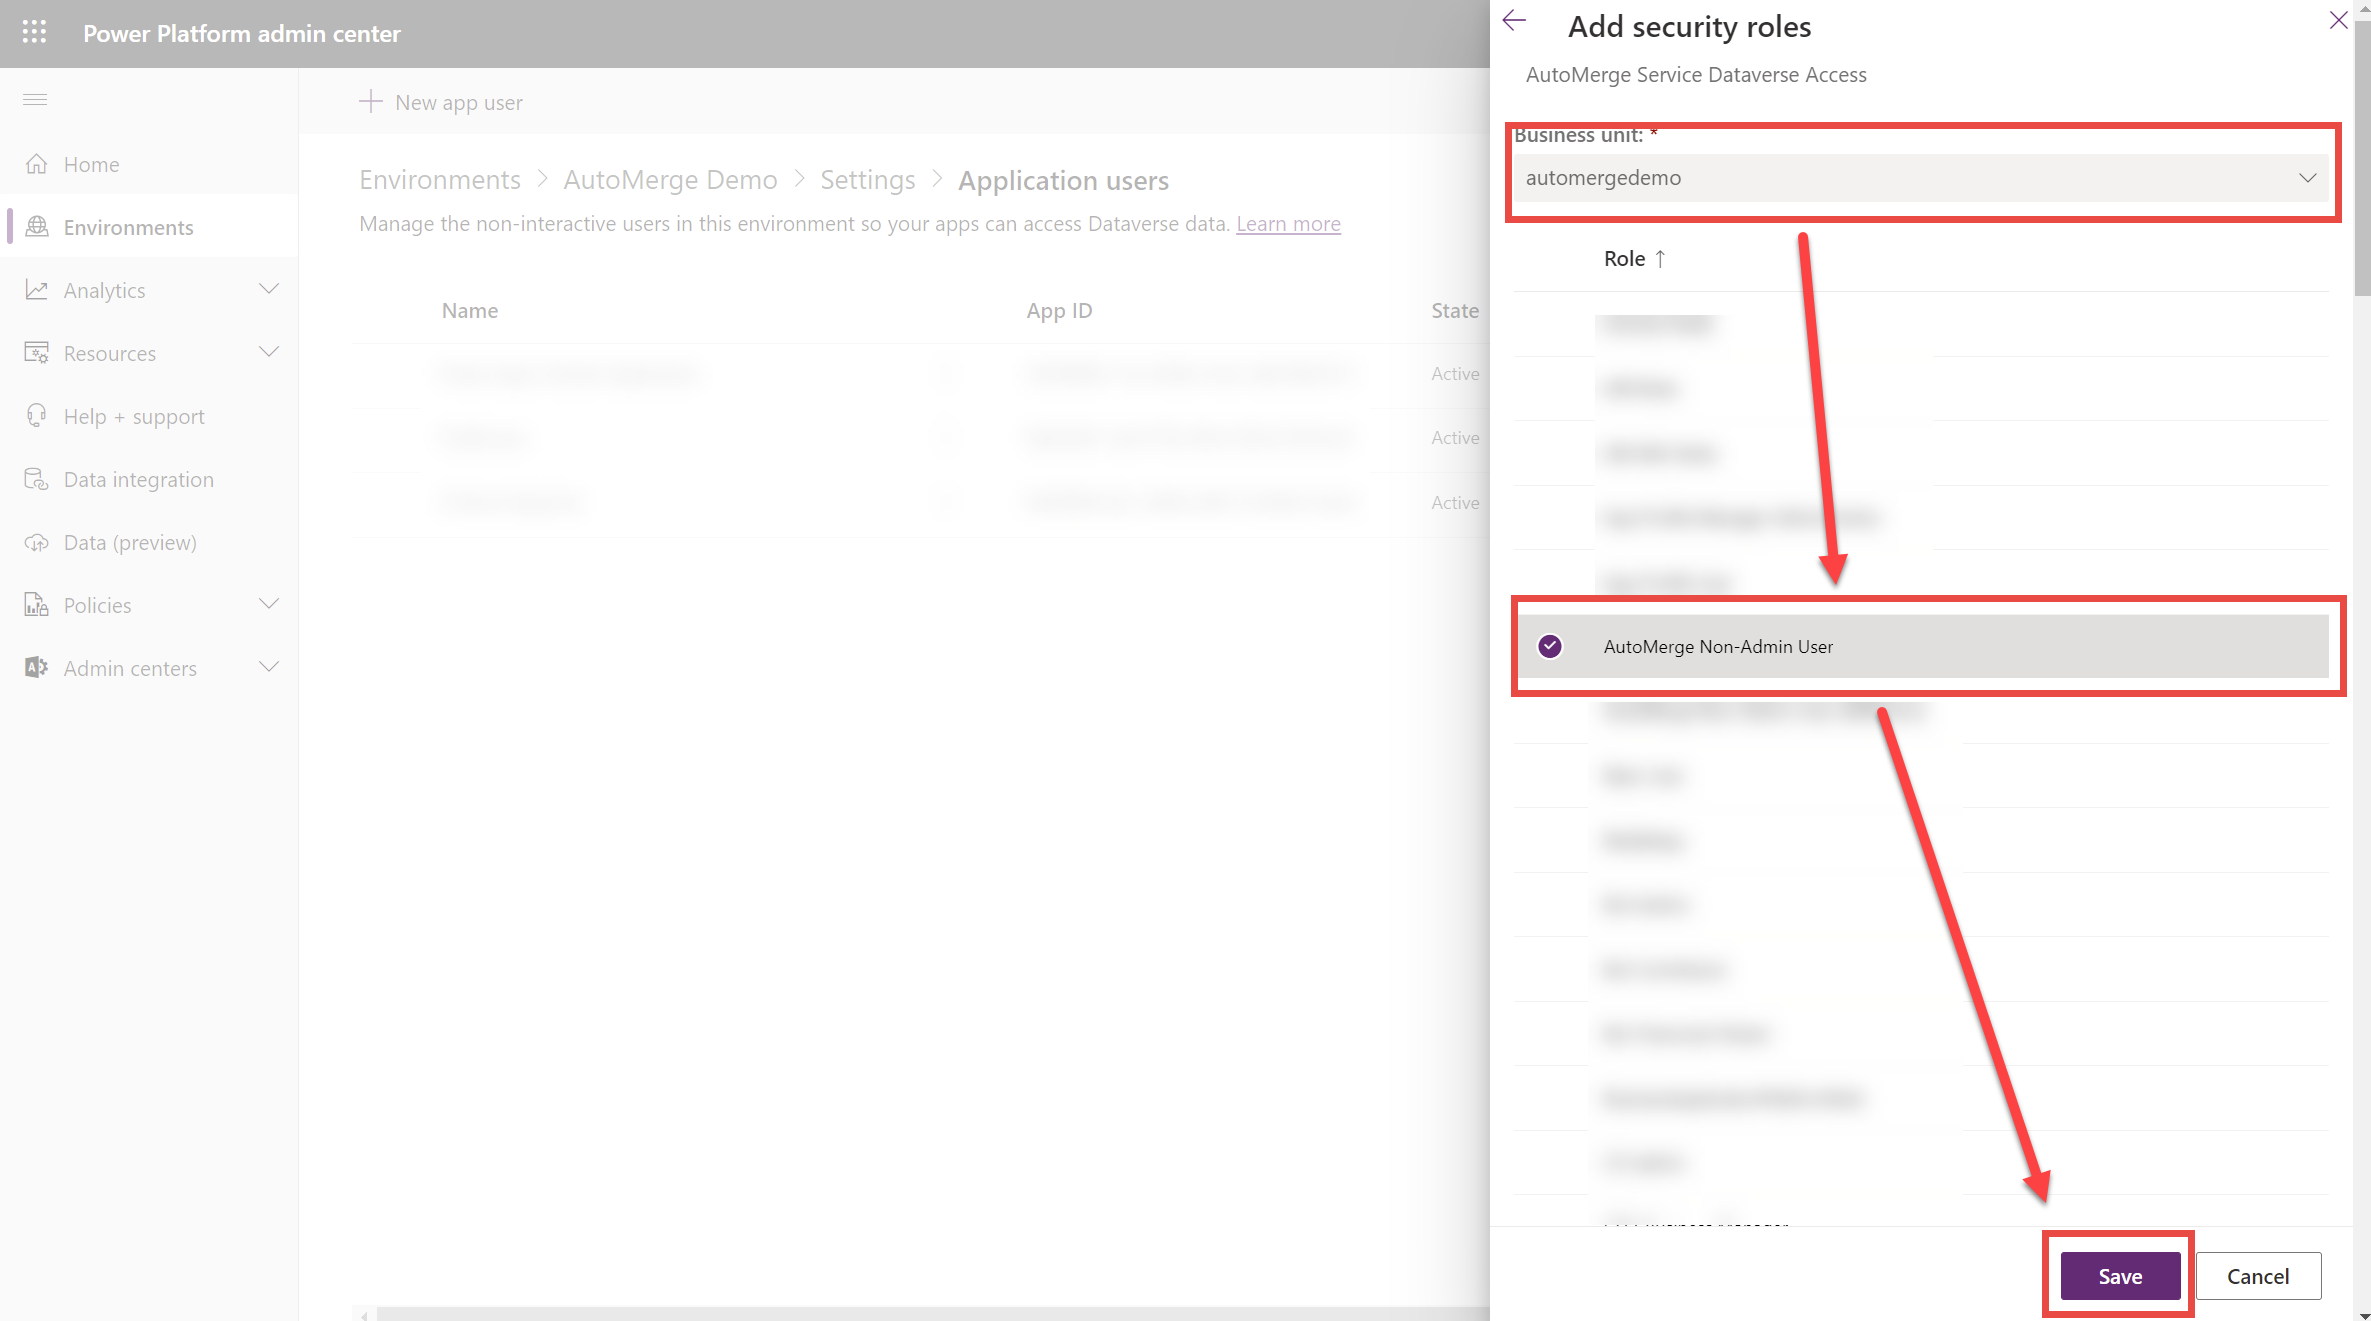
The screenshot above still shows the role's old name, AutoMerge Non-Admin User. It has since been renamed to AutoMerge Analysis/Tagging AppUser - Minimum Privs; the role itself is unchanged.
The AutoMerge Analysis/Tagging AppUser - Minimum Privs role comes from our managed solution. If it's missing, the solution isn't imported into this organization. See Install the AutoMerge Solution.
About the AutoMerge Analysis/Tagging AppUser - Minimum Privs role
It's a deliberately minimal role: org-wide read/write on Accounts, Contacts, and Leads. That's enough for the analysis engine to find duplicates and tag the results back into your CRM.
By design it does not have enough privileges to merge tagged duplicates. That only matters if you submit requests with Operation = AutoMerge from the Management App. Merging that users perform directly inside the CRM runs under their own security roles and is unaffected.
If you will submit Operation = AutoMerge requests, only the built-in System Administrator role is guaranteed to avoid merge privilege errors across all CRM environments, but granting that role should be a considered decision, not a default.
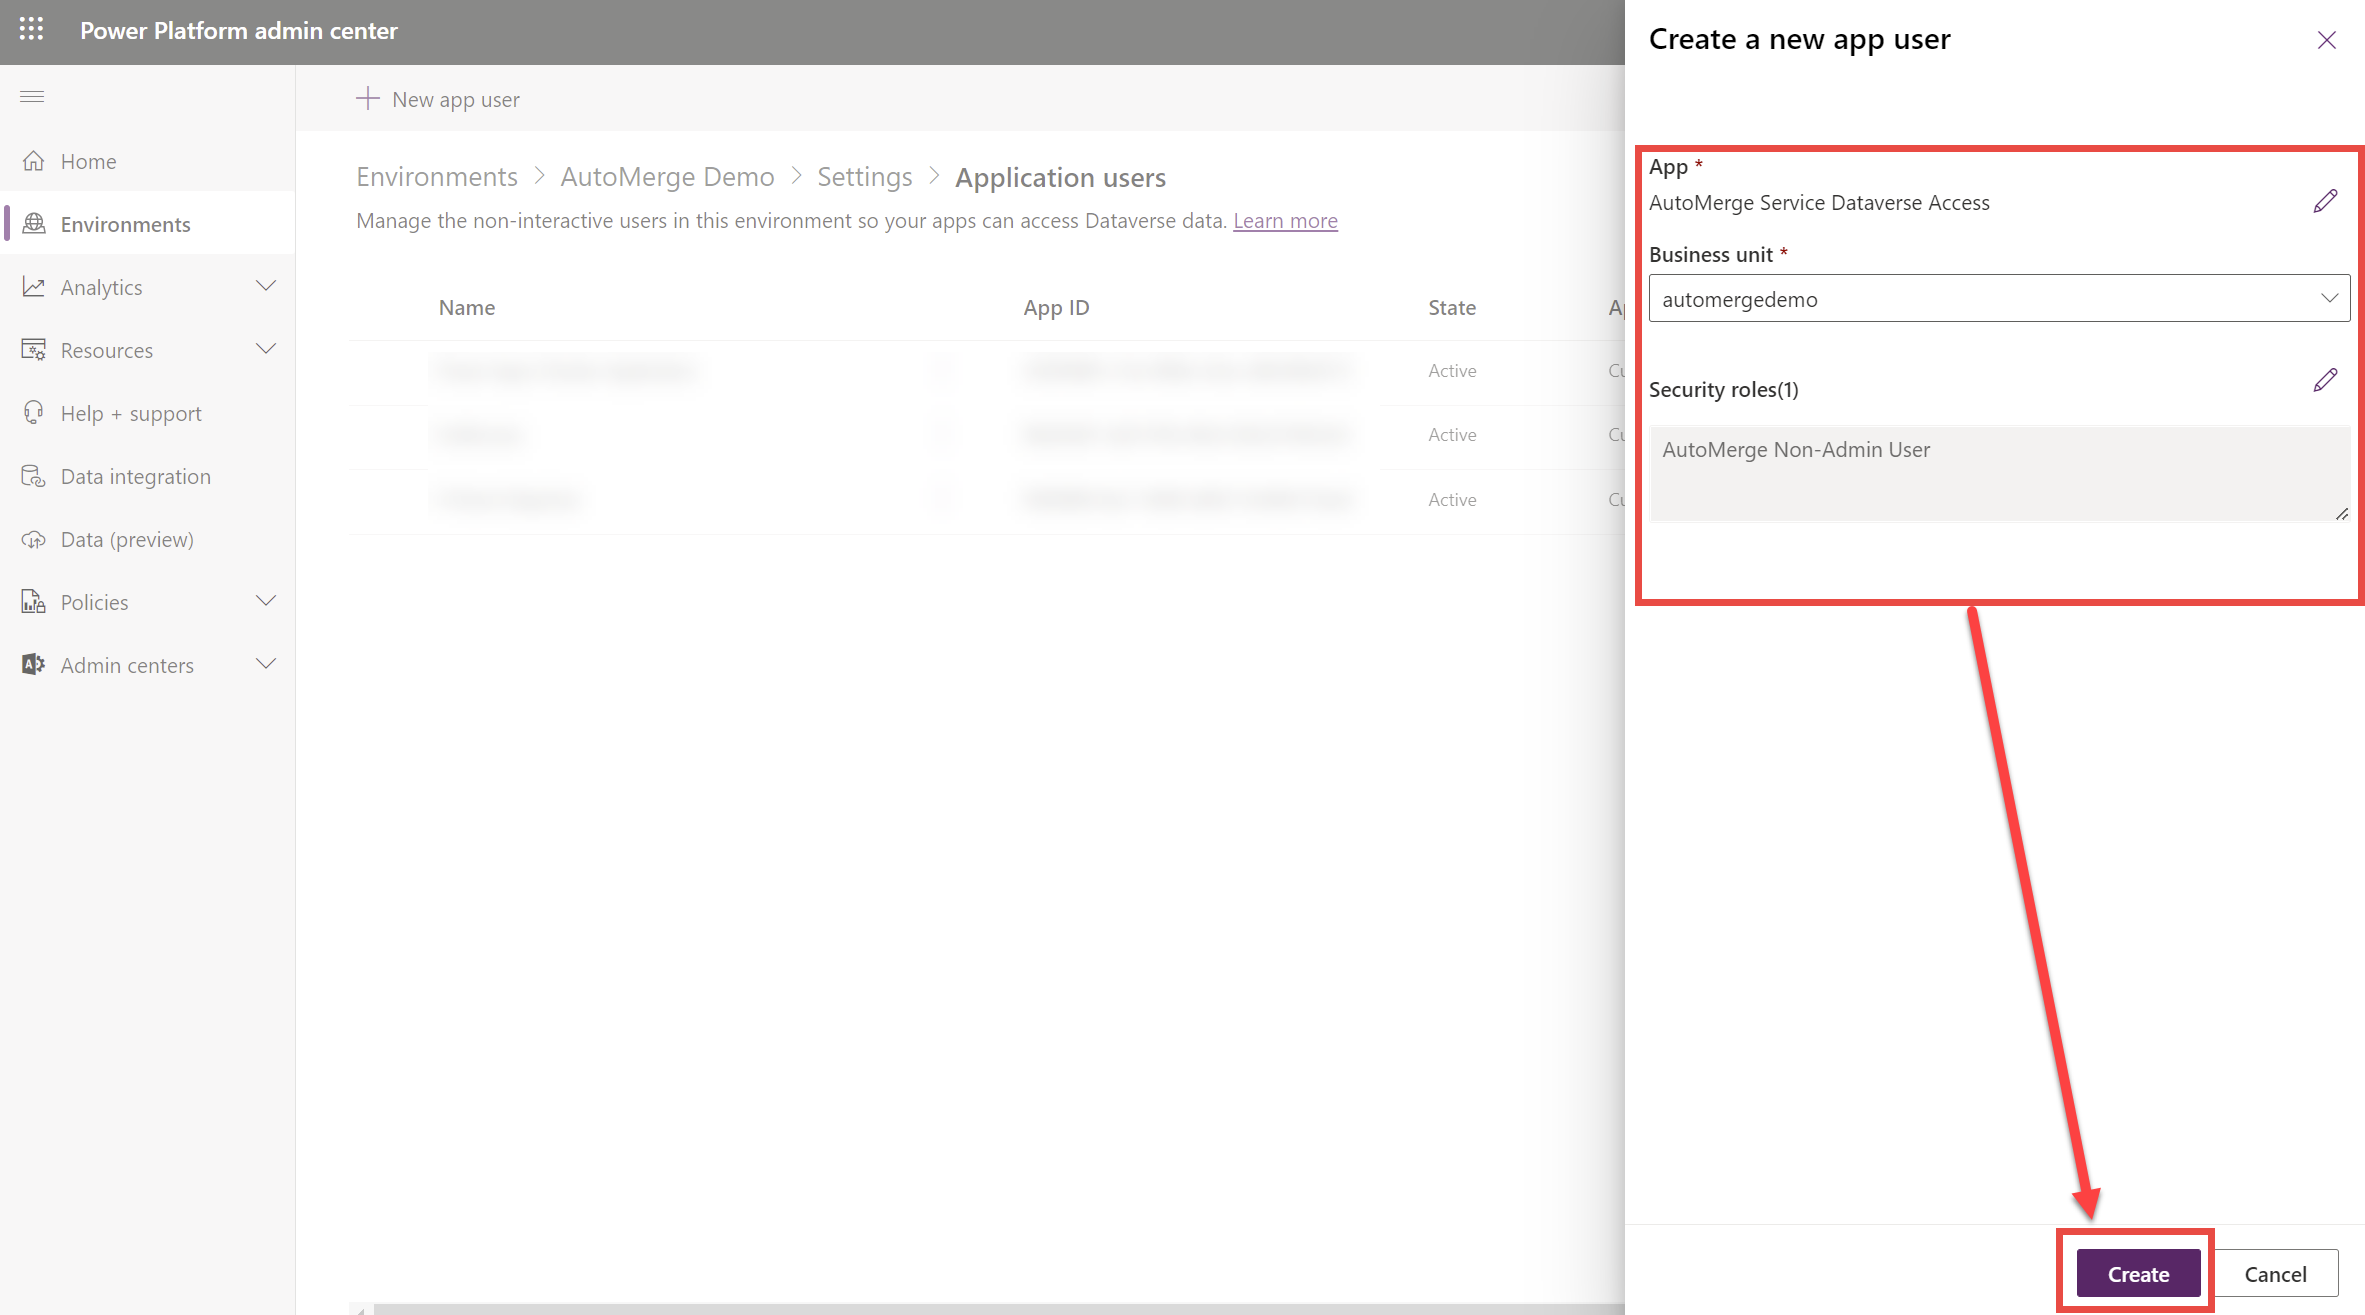
B-7. Create
Review and click Create.
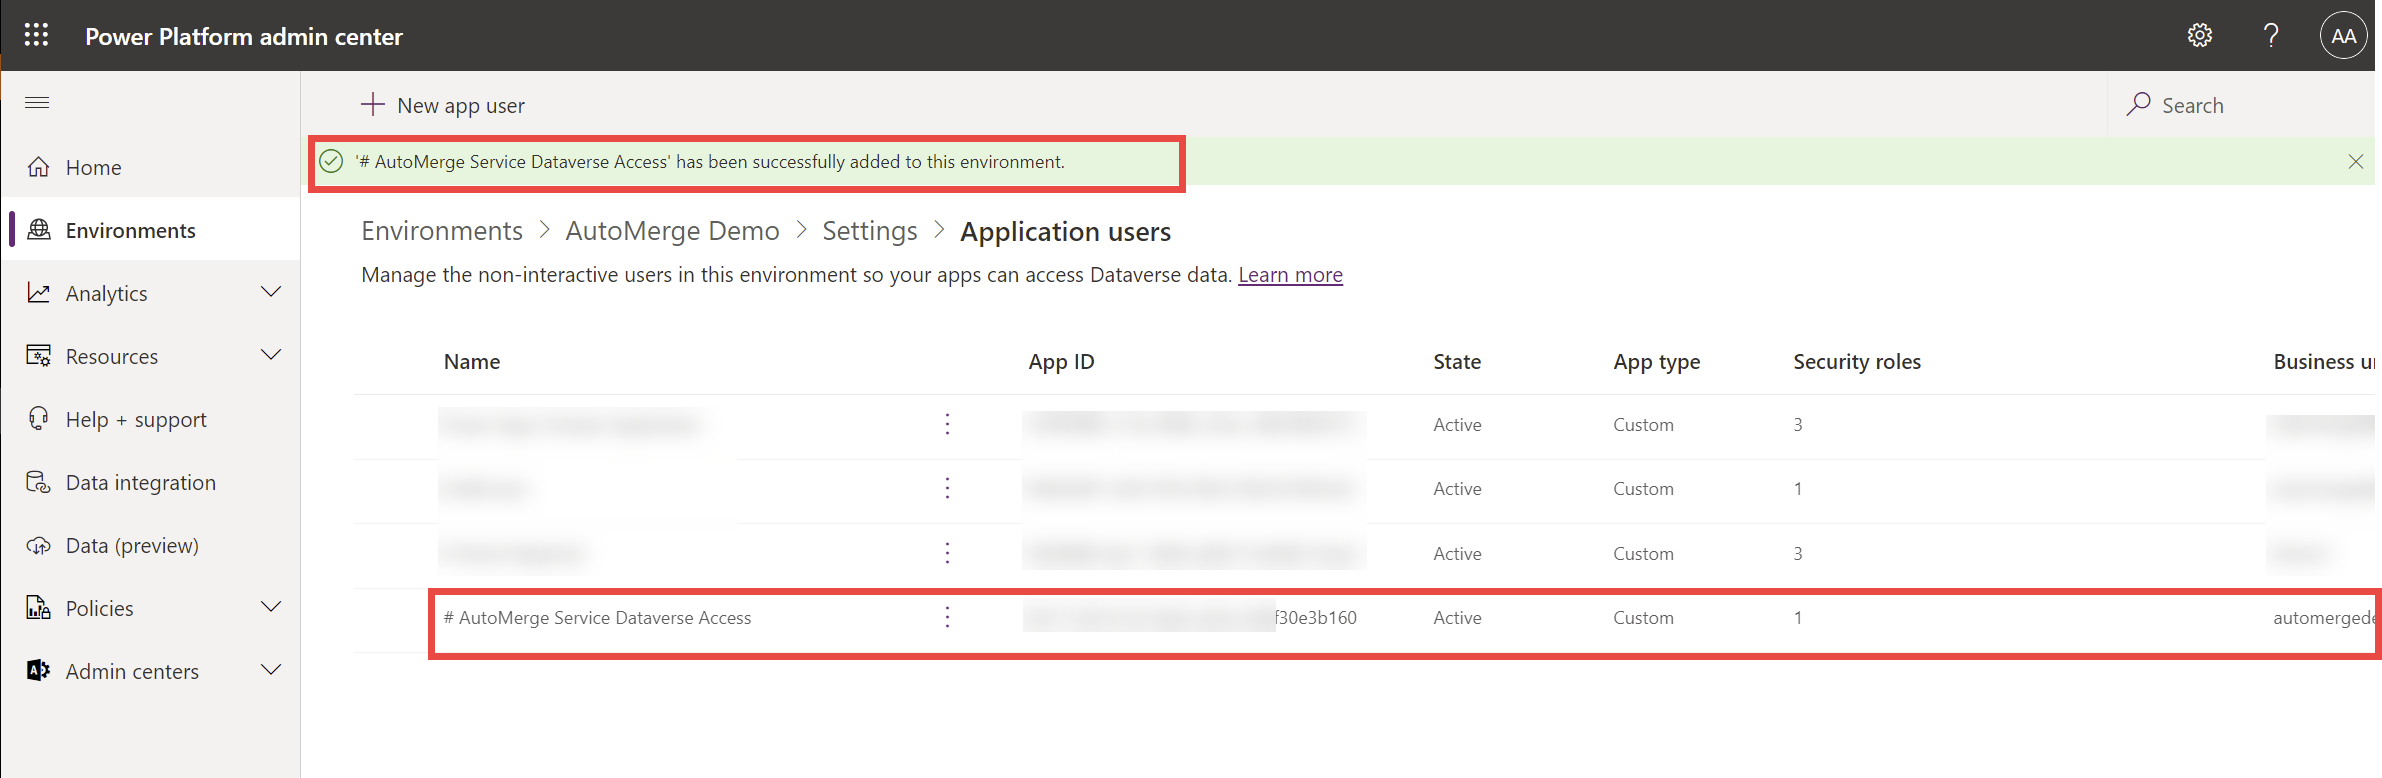
You should land on a confirmation.
Stage C. Verify the connection
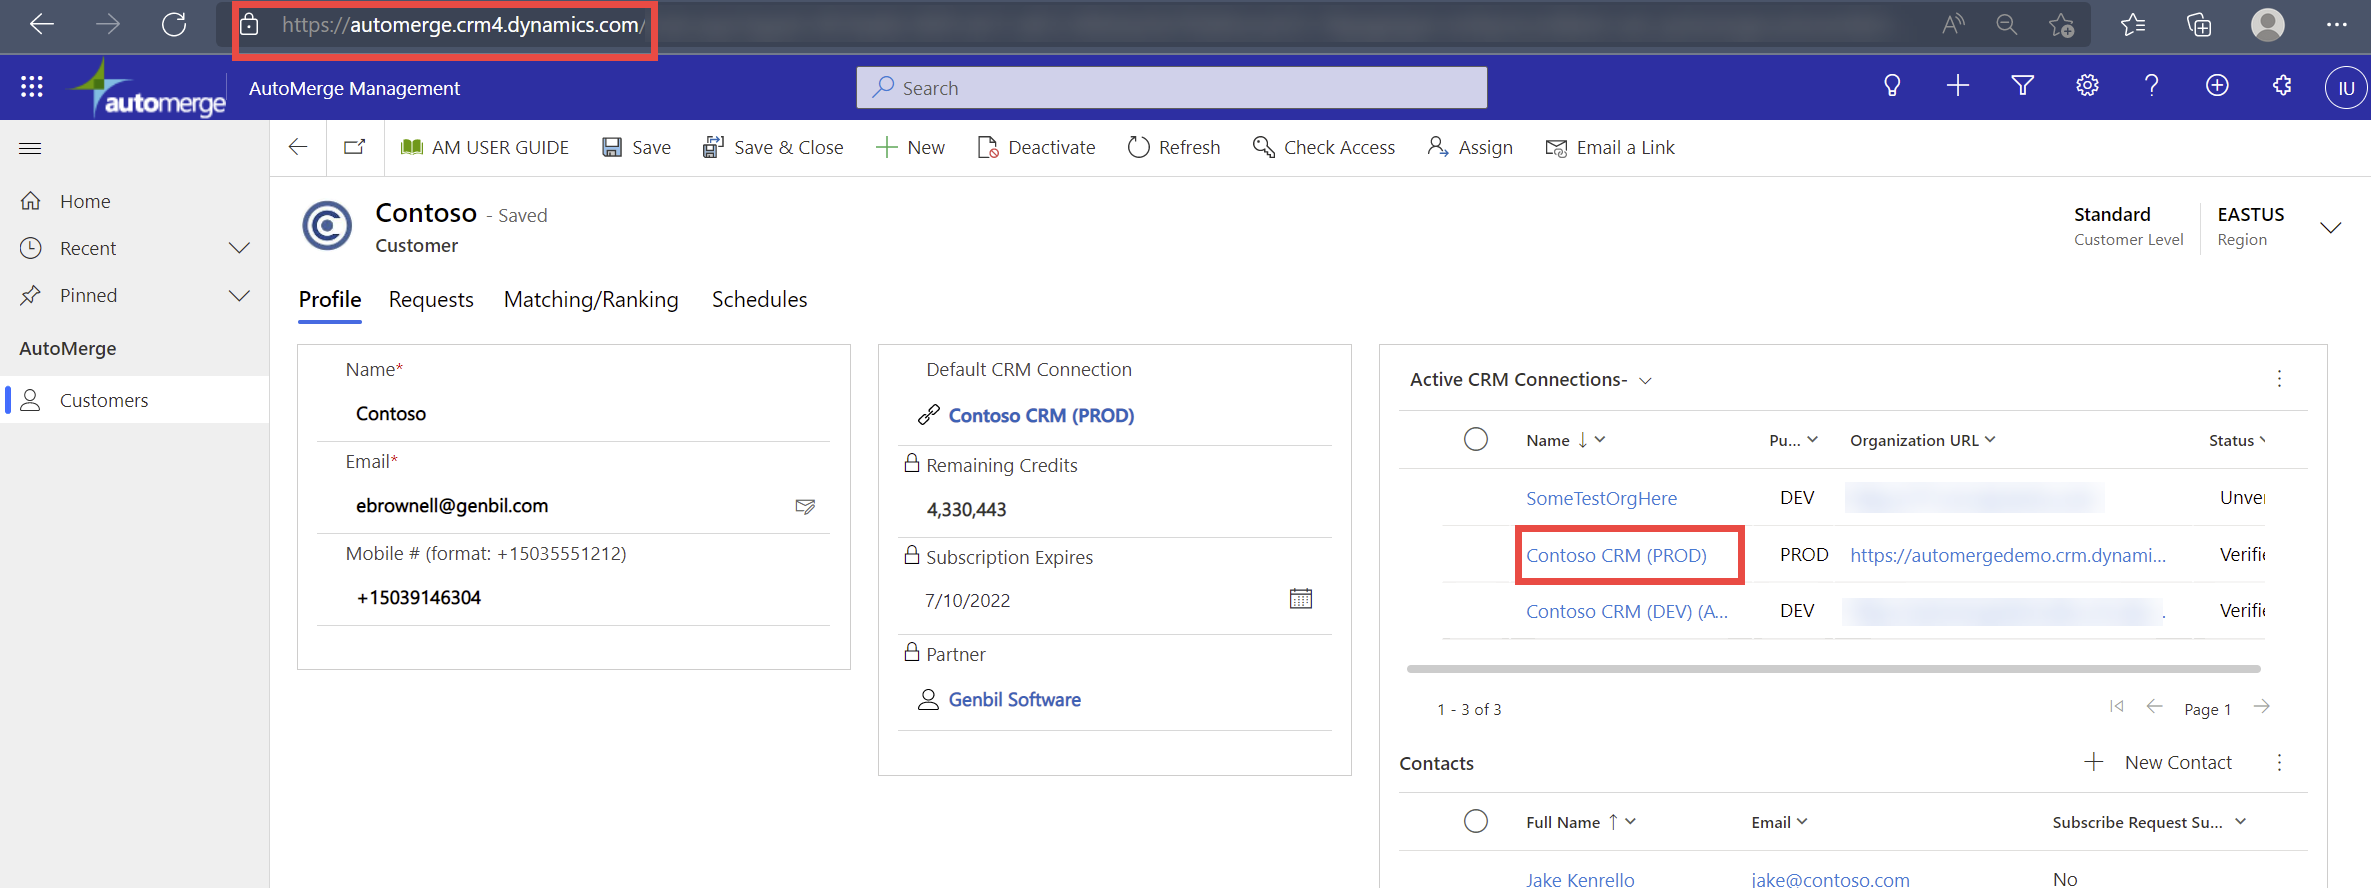
Sign in to the AutoMerge Management App at automerge.crm4.dynamics.com.
C-1. Open the CRM connection
From your customer profile, open the CRM connection you're setting up.
C-2. Open the verify page
If it isn't, check Clear Credentials and save.
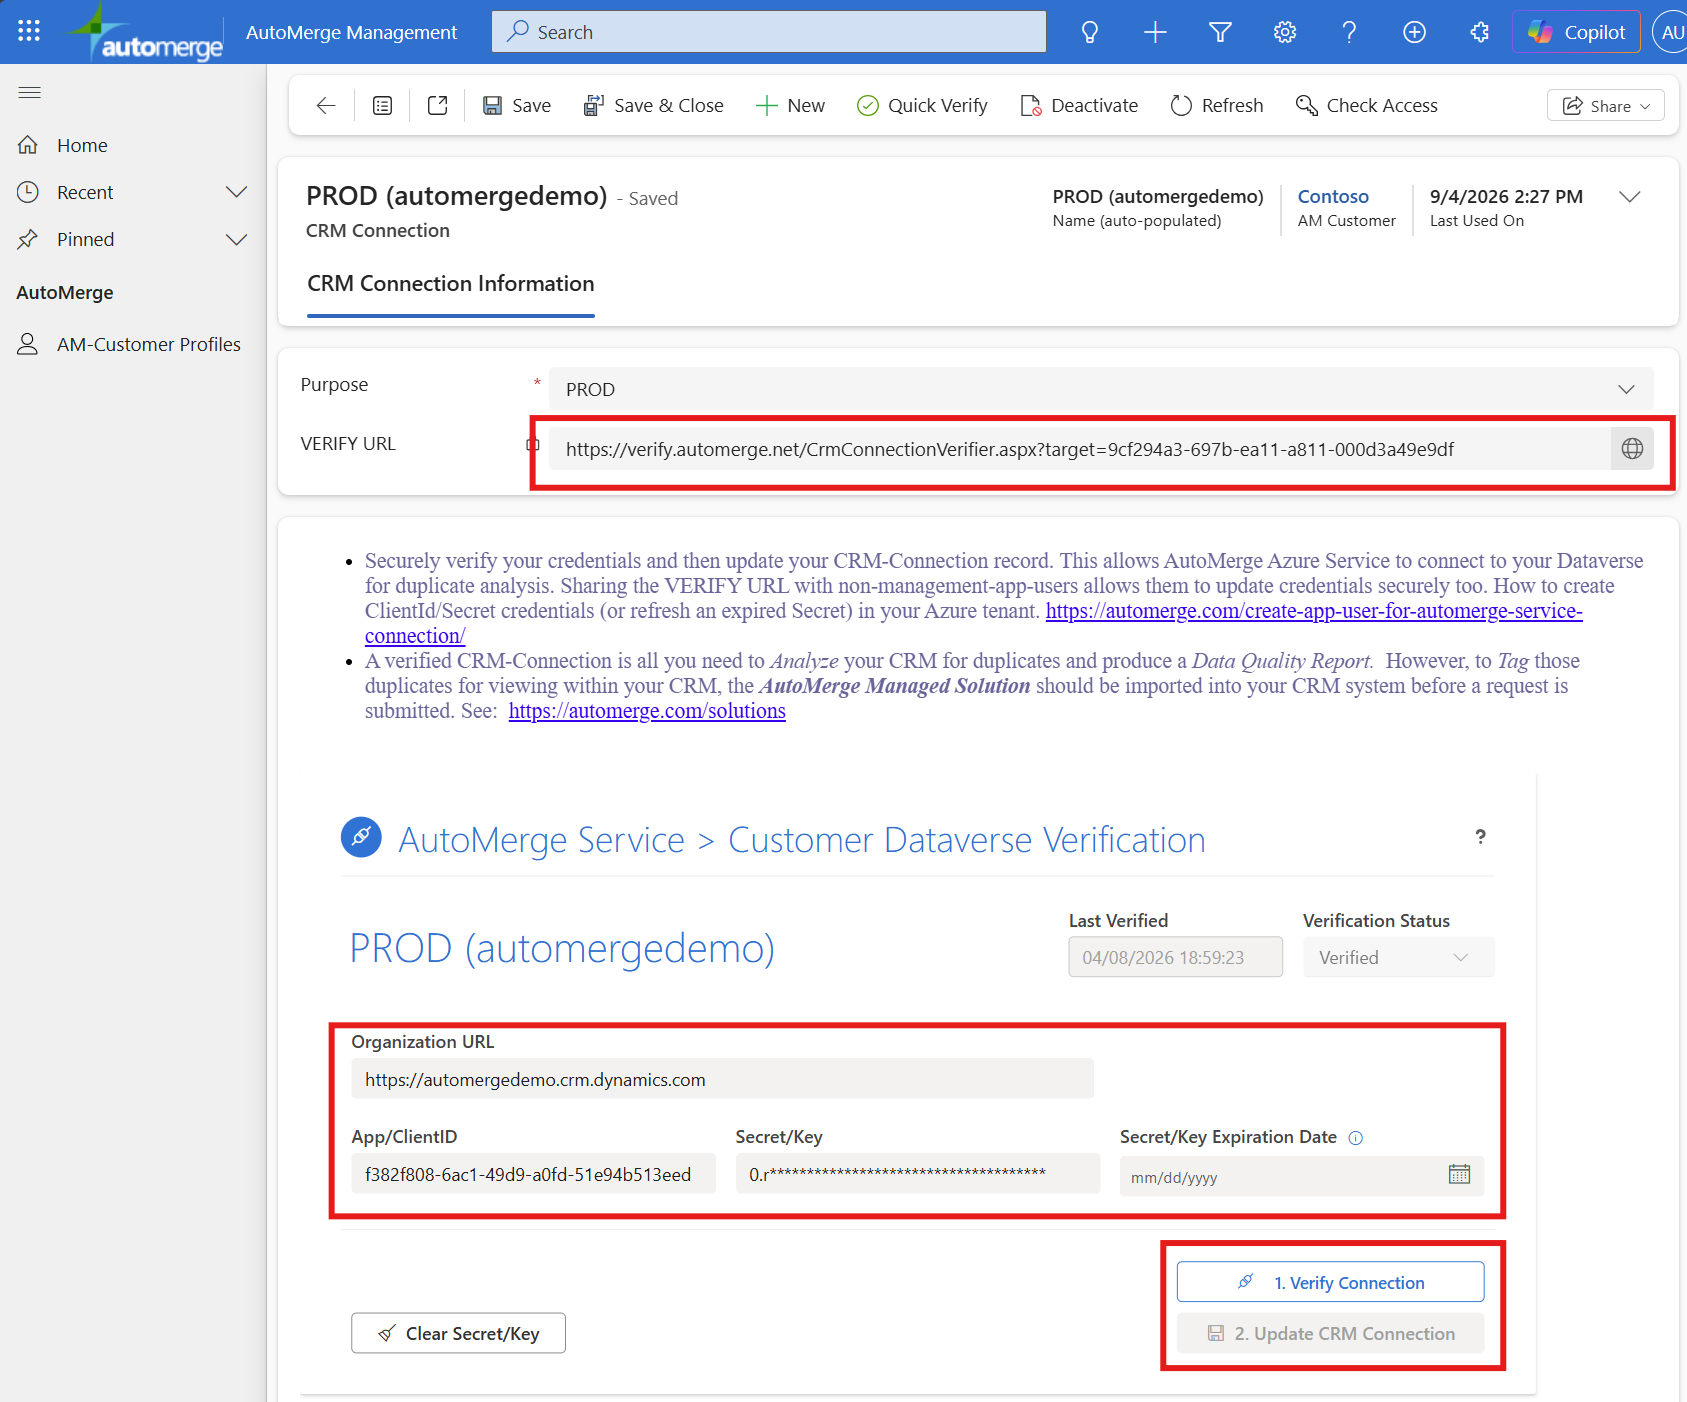
The VERIFY URL can be shared with anyone, even someone without Management App access, so they can update the credentials themselves. For Management App users, the verify page is also embedded right in this form and editable directly here.
C-3. Enter the credentials and verify
On the verify page:
| Field | Value |
|---|---|
| App/ClientID | From step A-4 |
| Secret/Key | From step A-9 |
| Organization URL | Your CRM org URL |
If you enter the secret's expiration date here, you'll get a reminder email before it expires so you can update it in time. Skipping this field means no warning, and an expired secret stops the AutoMerge service until someone notices and fixes it.
Verifying is two steps, both buttons on the page: click 1. Verify Connection first, then 2. Update CRM Connection to save the verified credentials back onto the connection record.
That's it. The AutoMerge service can now reach this organization.
Next steps
- Define your matching, ranking, and precision rules
- Submit your first analysis request against a Sandbox connection before pointing at Production